How To Make Faux Ceramic Pumpkins
The “trash to terra cotta” trend, aka adding baking soda to paint to create a faux ceramic look, has been going strong this year. I’ve finally jumped on the bandwagon and now I want to try it out on everything! Earlier this summer, I created some amazing textured art pieces using canvas and this paint method. You can find the tutorial here. Now that fall is quickly approaching, I thought it would be the perfect time to make some faux ceramic pumpkins. You only need a couple of materials and they look super chic!
Materials:
Foam Craft Pumpkins (these are the ones I used)
Acrylic Paint
Baking Soda
Faux Florals (optional)
I purchased a big pack of these small white foam pumpkins on Amazon, and they are great for styling throughout the house. The first step is to decide what color you want to paint your pumpkins. I’ve been having a lot of fun mixing up custom colors using my acrylic craft paints, but you can also go with a color straight from the bottle.

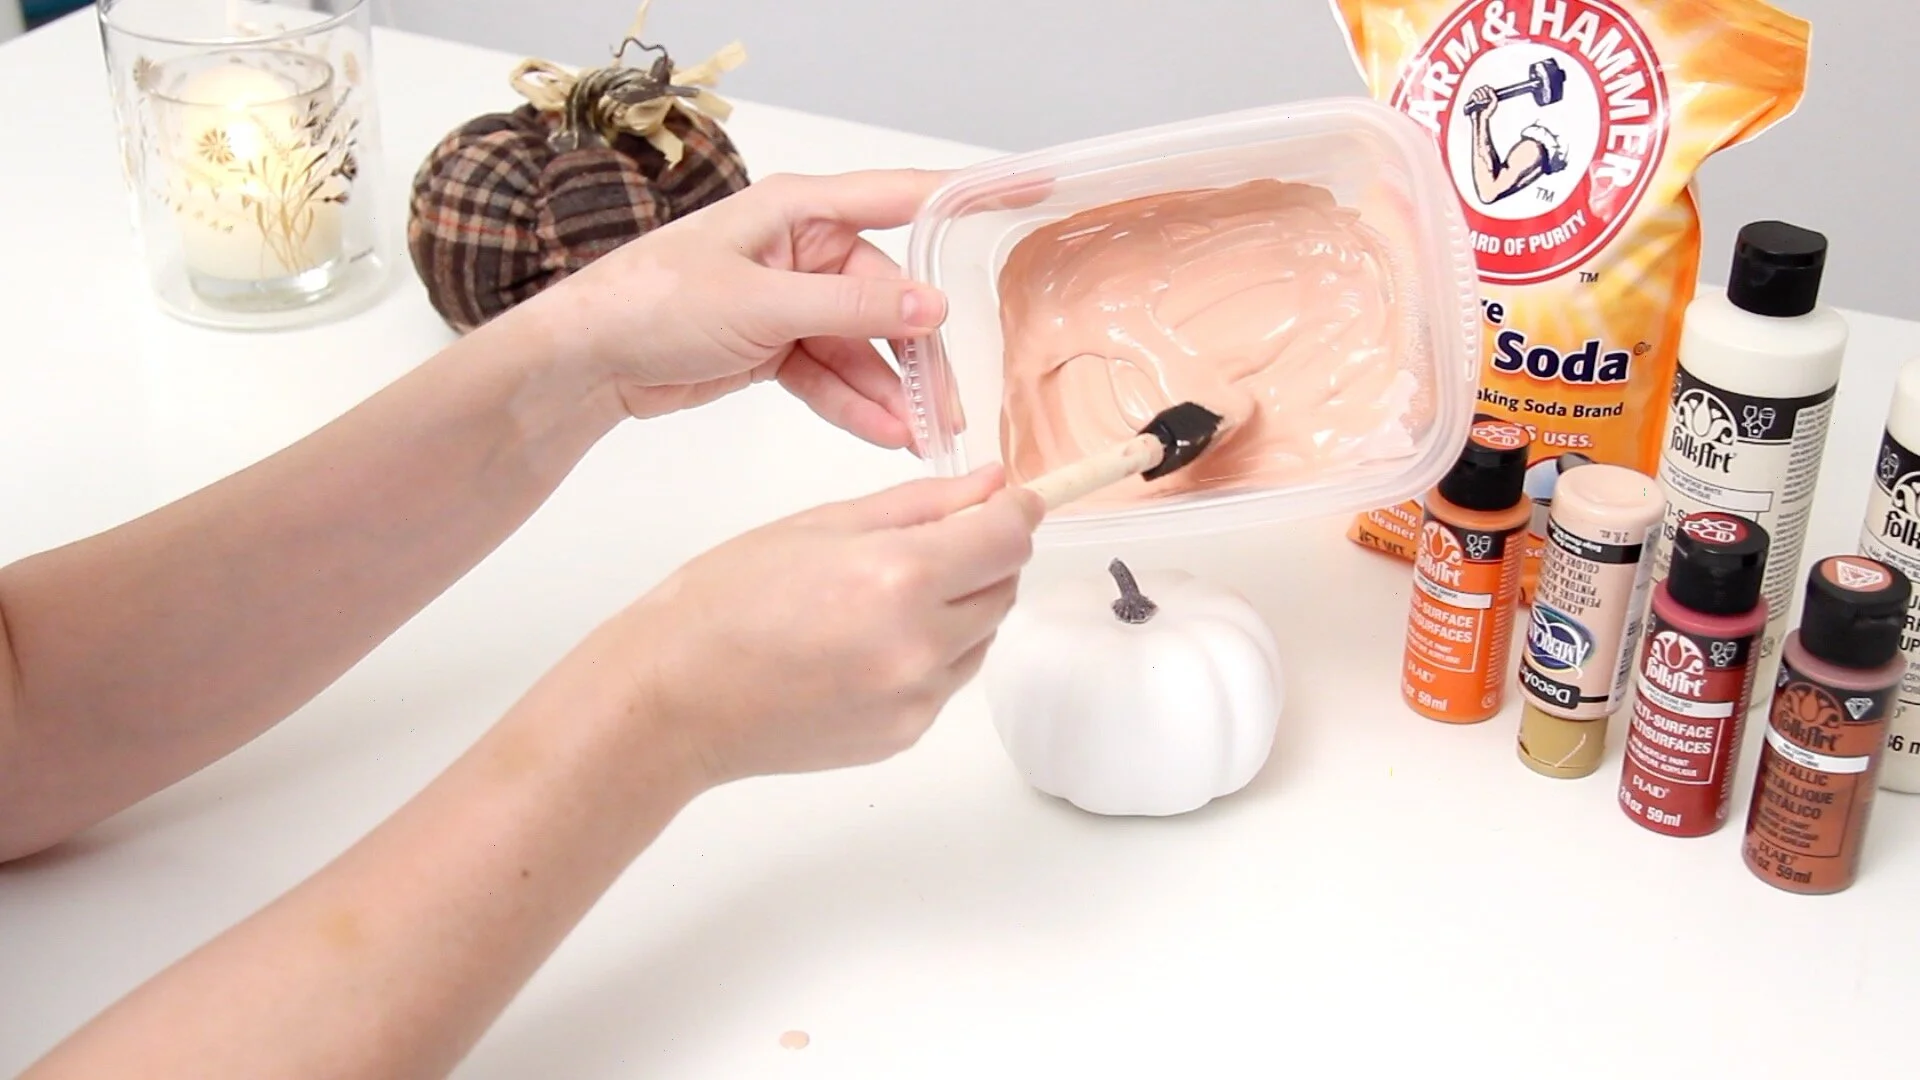
Next you’ll add some baking soda to the paint. I’m not usually one for measuring, I like to eyeball things. I start with just a small amount, a tablespoon or so, and mix it with the paint. It will start to fluff up a bit. You want it to be thicker than plain paint, but not so thick that it’s clumpy and dry. The baking soda just adds the slightest bit of texture which creates the faux ceramic look.


Paint a thin layer of this paint and baking soda mixture onto the craft pumpkin. The first layer should just barely cover the surface, it doesn’t need to be thick or provide full coverage just yet. Once the pumpkin is completely coated, let it dry for about 20 minutes.

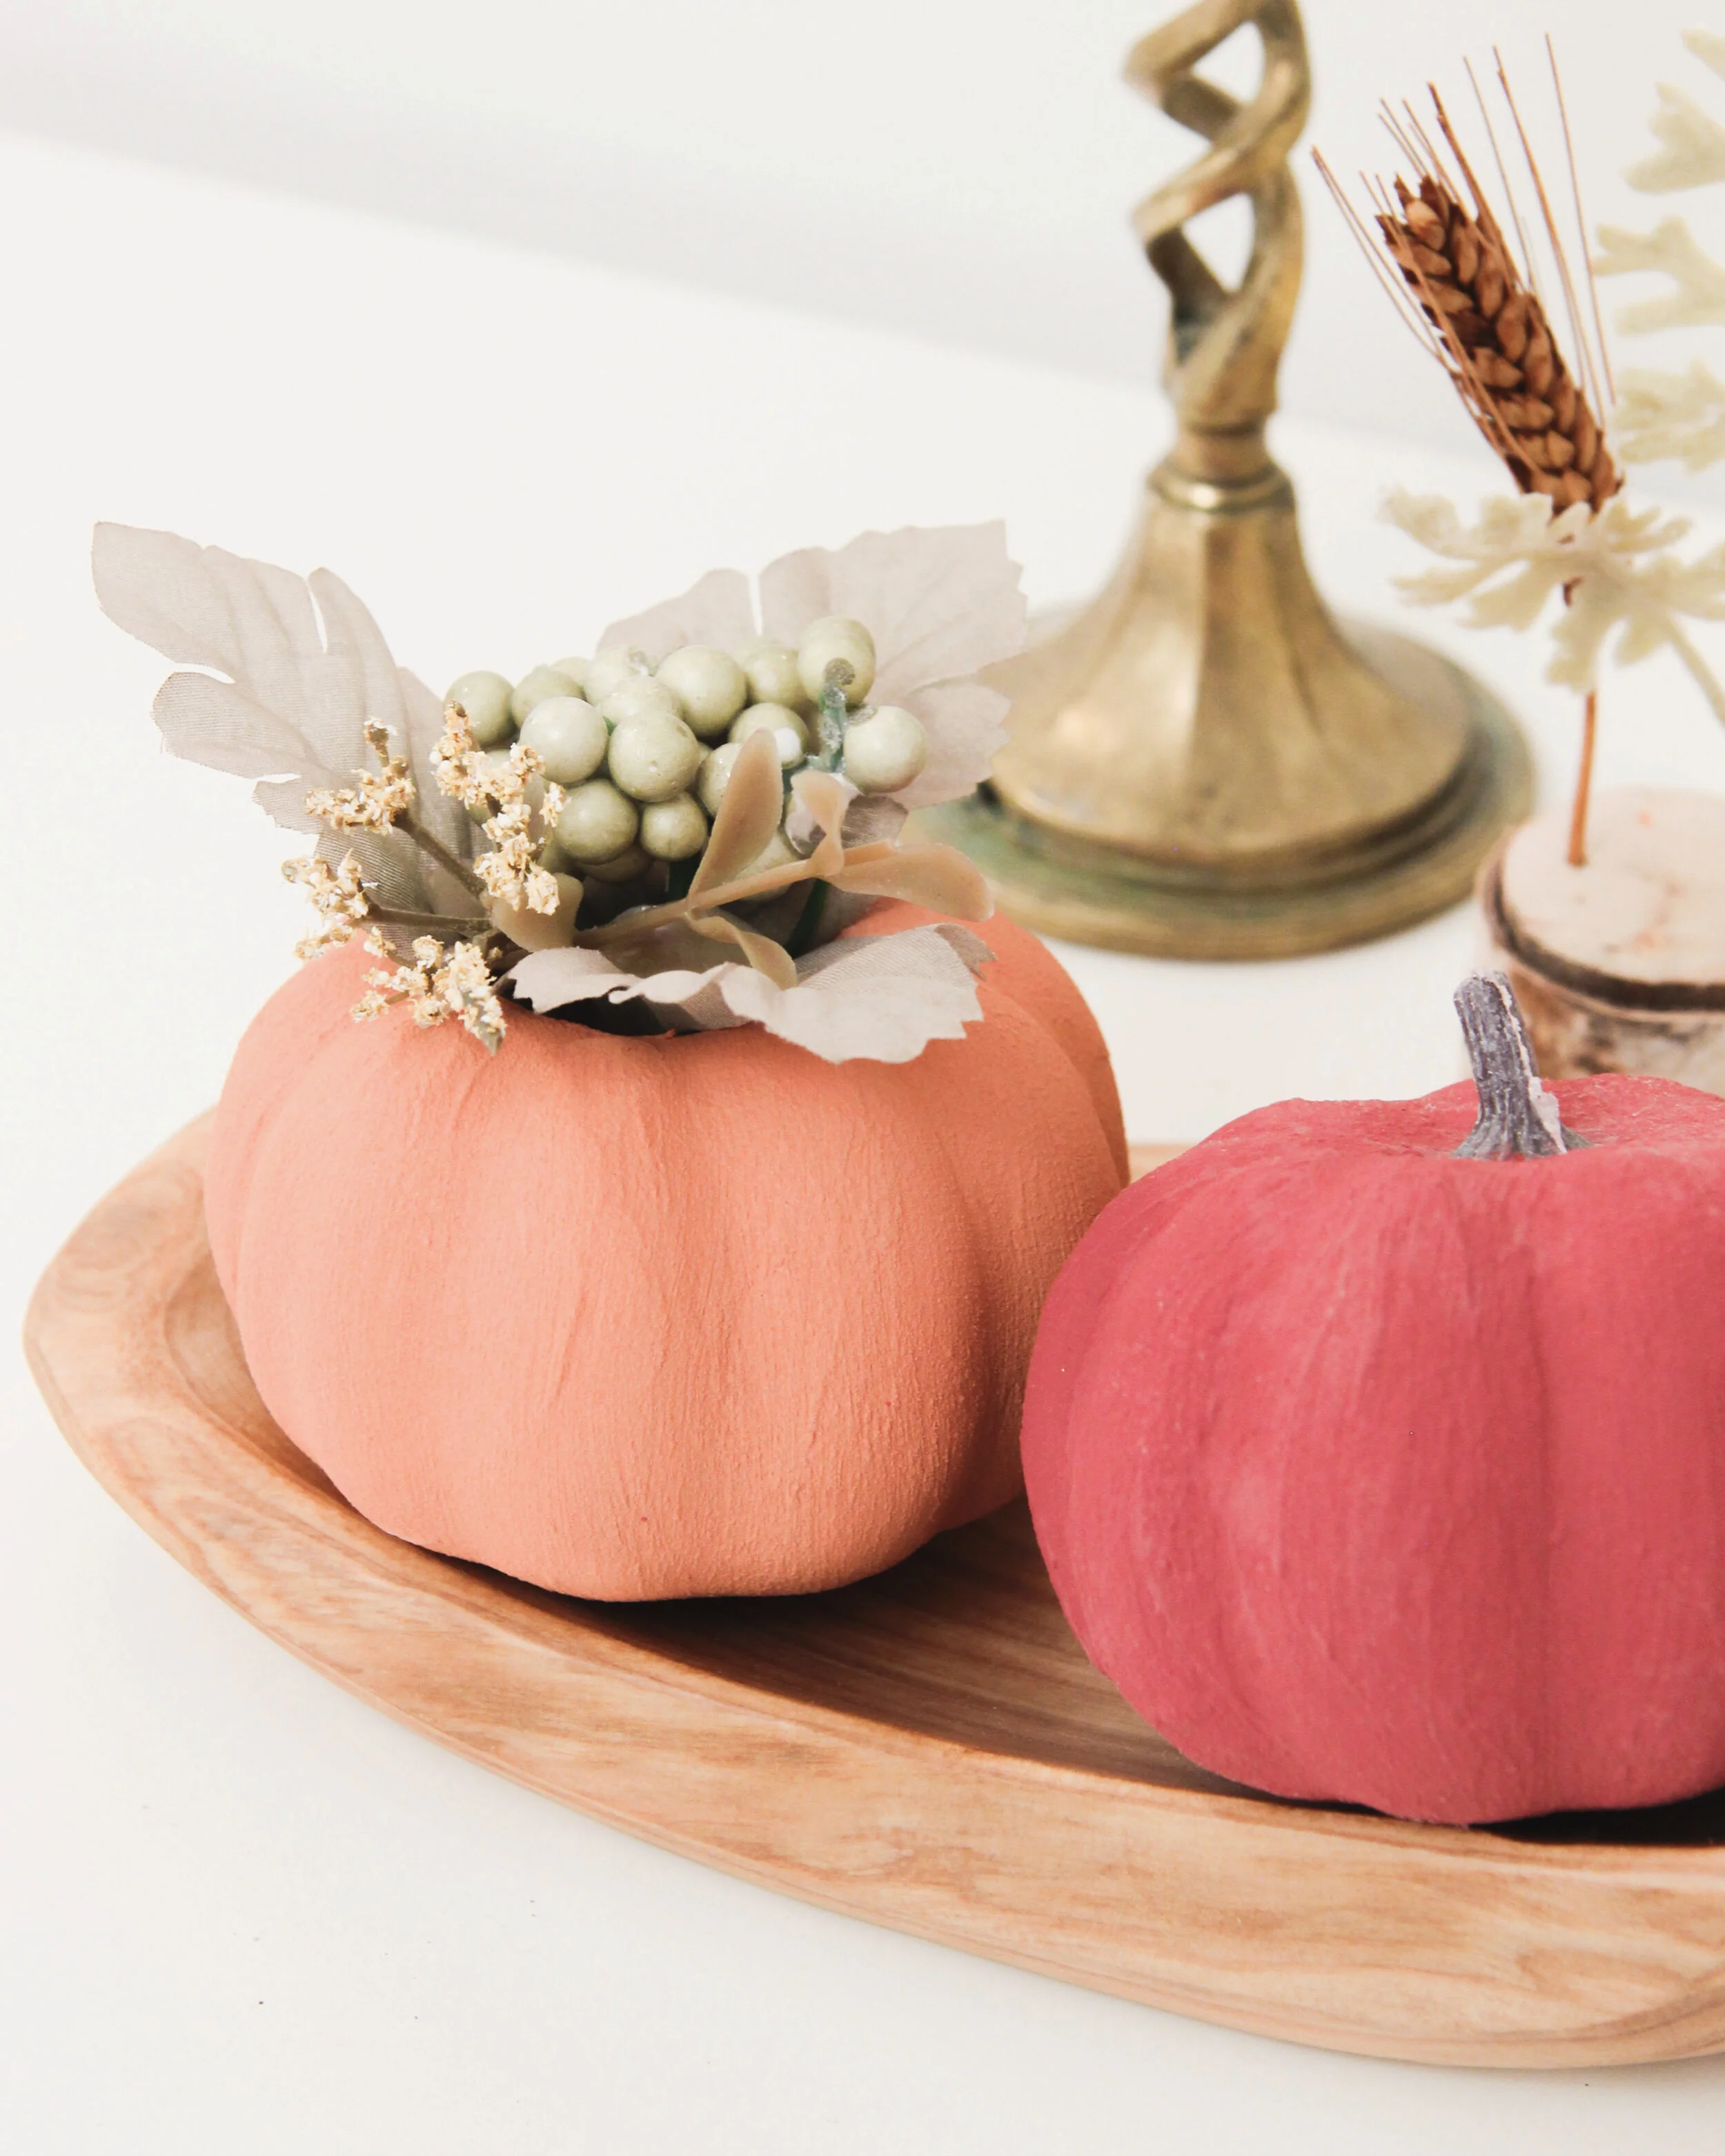
I also decided to cut a hole in the top of one of the pumpkins, so that I could add some faux florals once it was done. I like how this adds a little bit of variety when I’m styling them. I used an x-acto knife to cut the hole, which was very easy since it’s just foam.


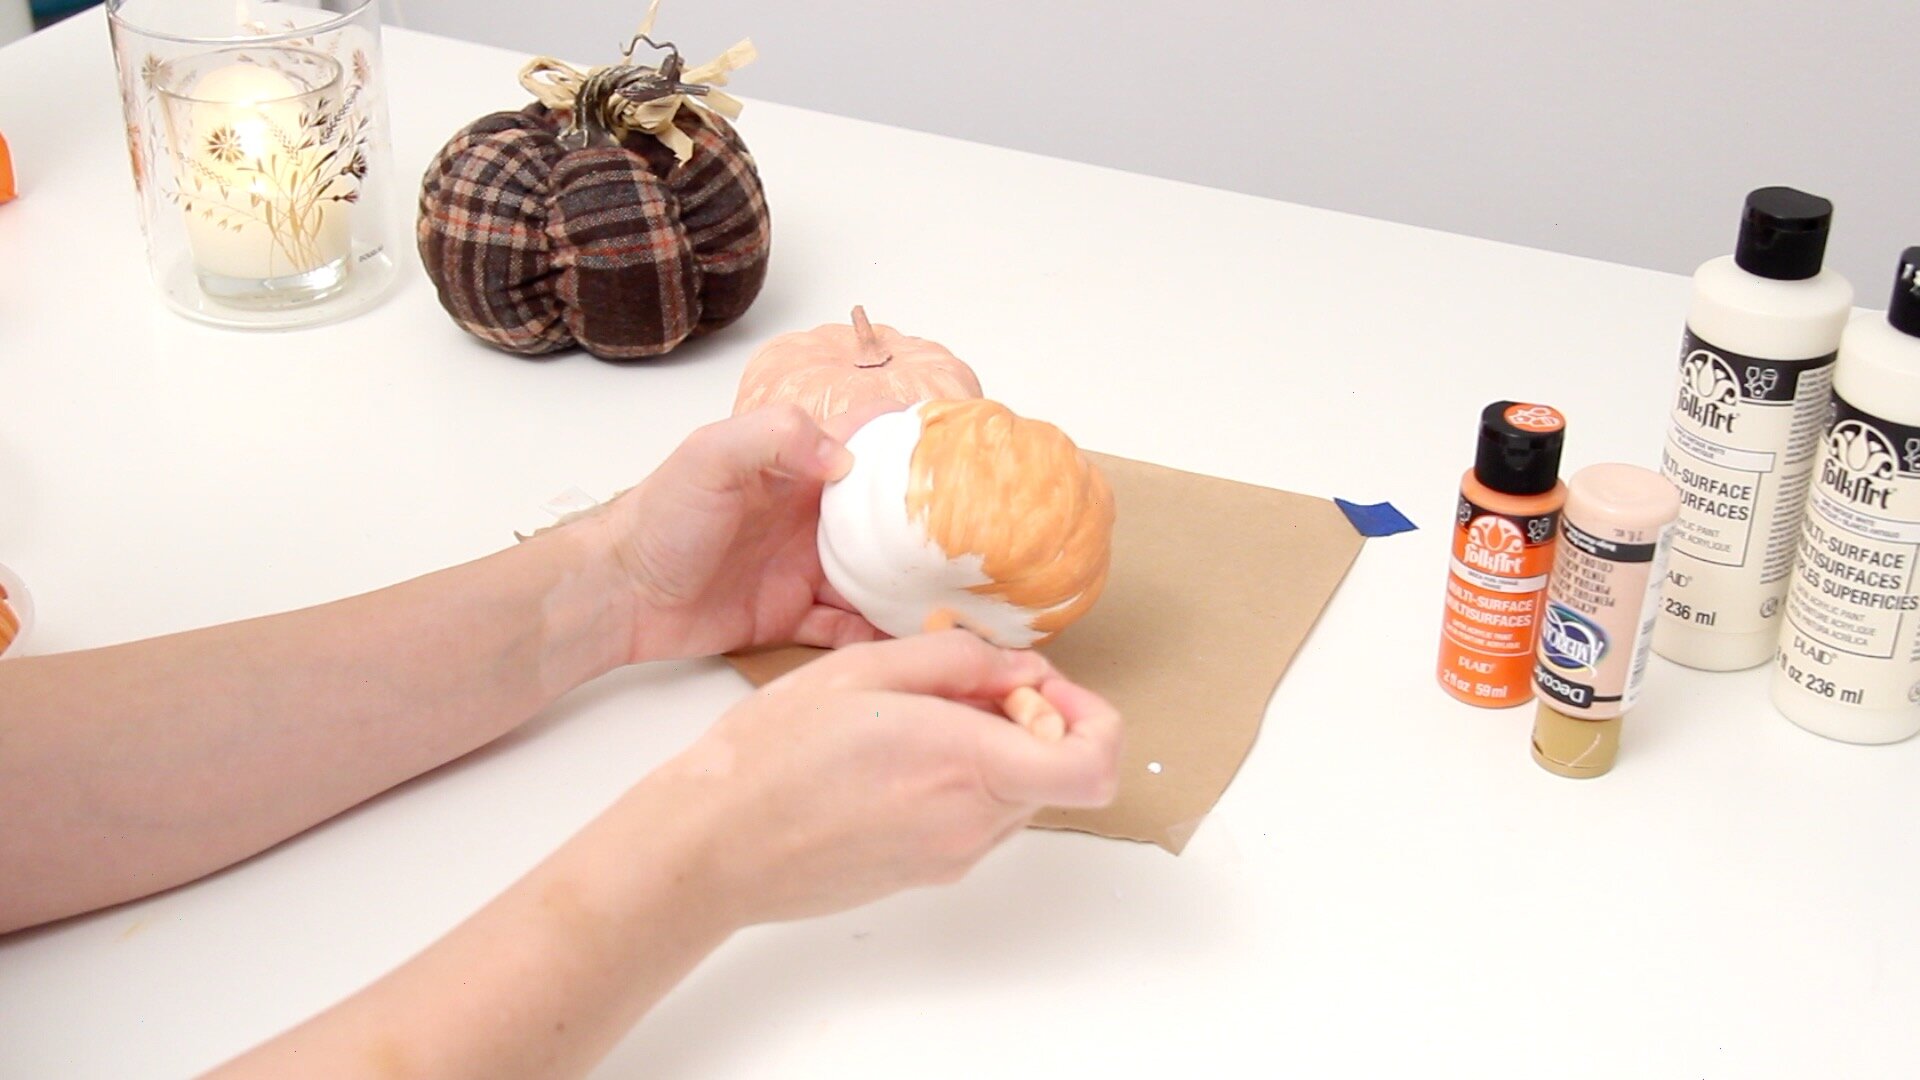
Once the first coat of paint is dry, add a second coat, this time layering it on fairly thick. You want to give the pumpkin full coverage, and you’ll begin to see the texture of the paint this time around. Try to smooth out any lumps or bumps. Let it dry for another 30 minutes or so, and then they’re all done! I can’t believe how this simple trick can really elevate the look of so many different items. I can’t wait to play around with more color combinations and style these around my home for fall.
If you try this out, don’t forget to share your DIY photos and tag me on Instagram. Watch my video for a thorough tutorial and other easy fall DIY projects. I can’t wait to see what you make!


Pin this for later!