HOW TO MAKE A FLORAL WALL HANGING
Hey all! I hope you had a great weekend and are ready to jump into a new week. I’m excited because I get to share with you how I created a gorgeous floral wall hanging which is now proudly displayed in my home office. Let’s hop right into it!
To start, I selected a bunch of supplies from Afloral.com. They are your one stop shop for everything floral related, from artificial flowers and greens to wedding bouquet, centerpiece, and holiday supplies.
Materials:
BRANCH
RIBBON
YARN
ARTIFICIAL FLOWERS
DRIED EUCALYPTUS
TWINE
HOT GLUE GUN AND HOT GLUE
WIRE CUTTERS
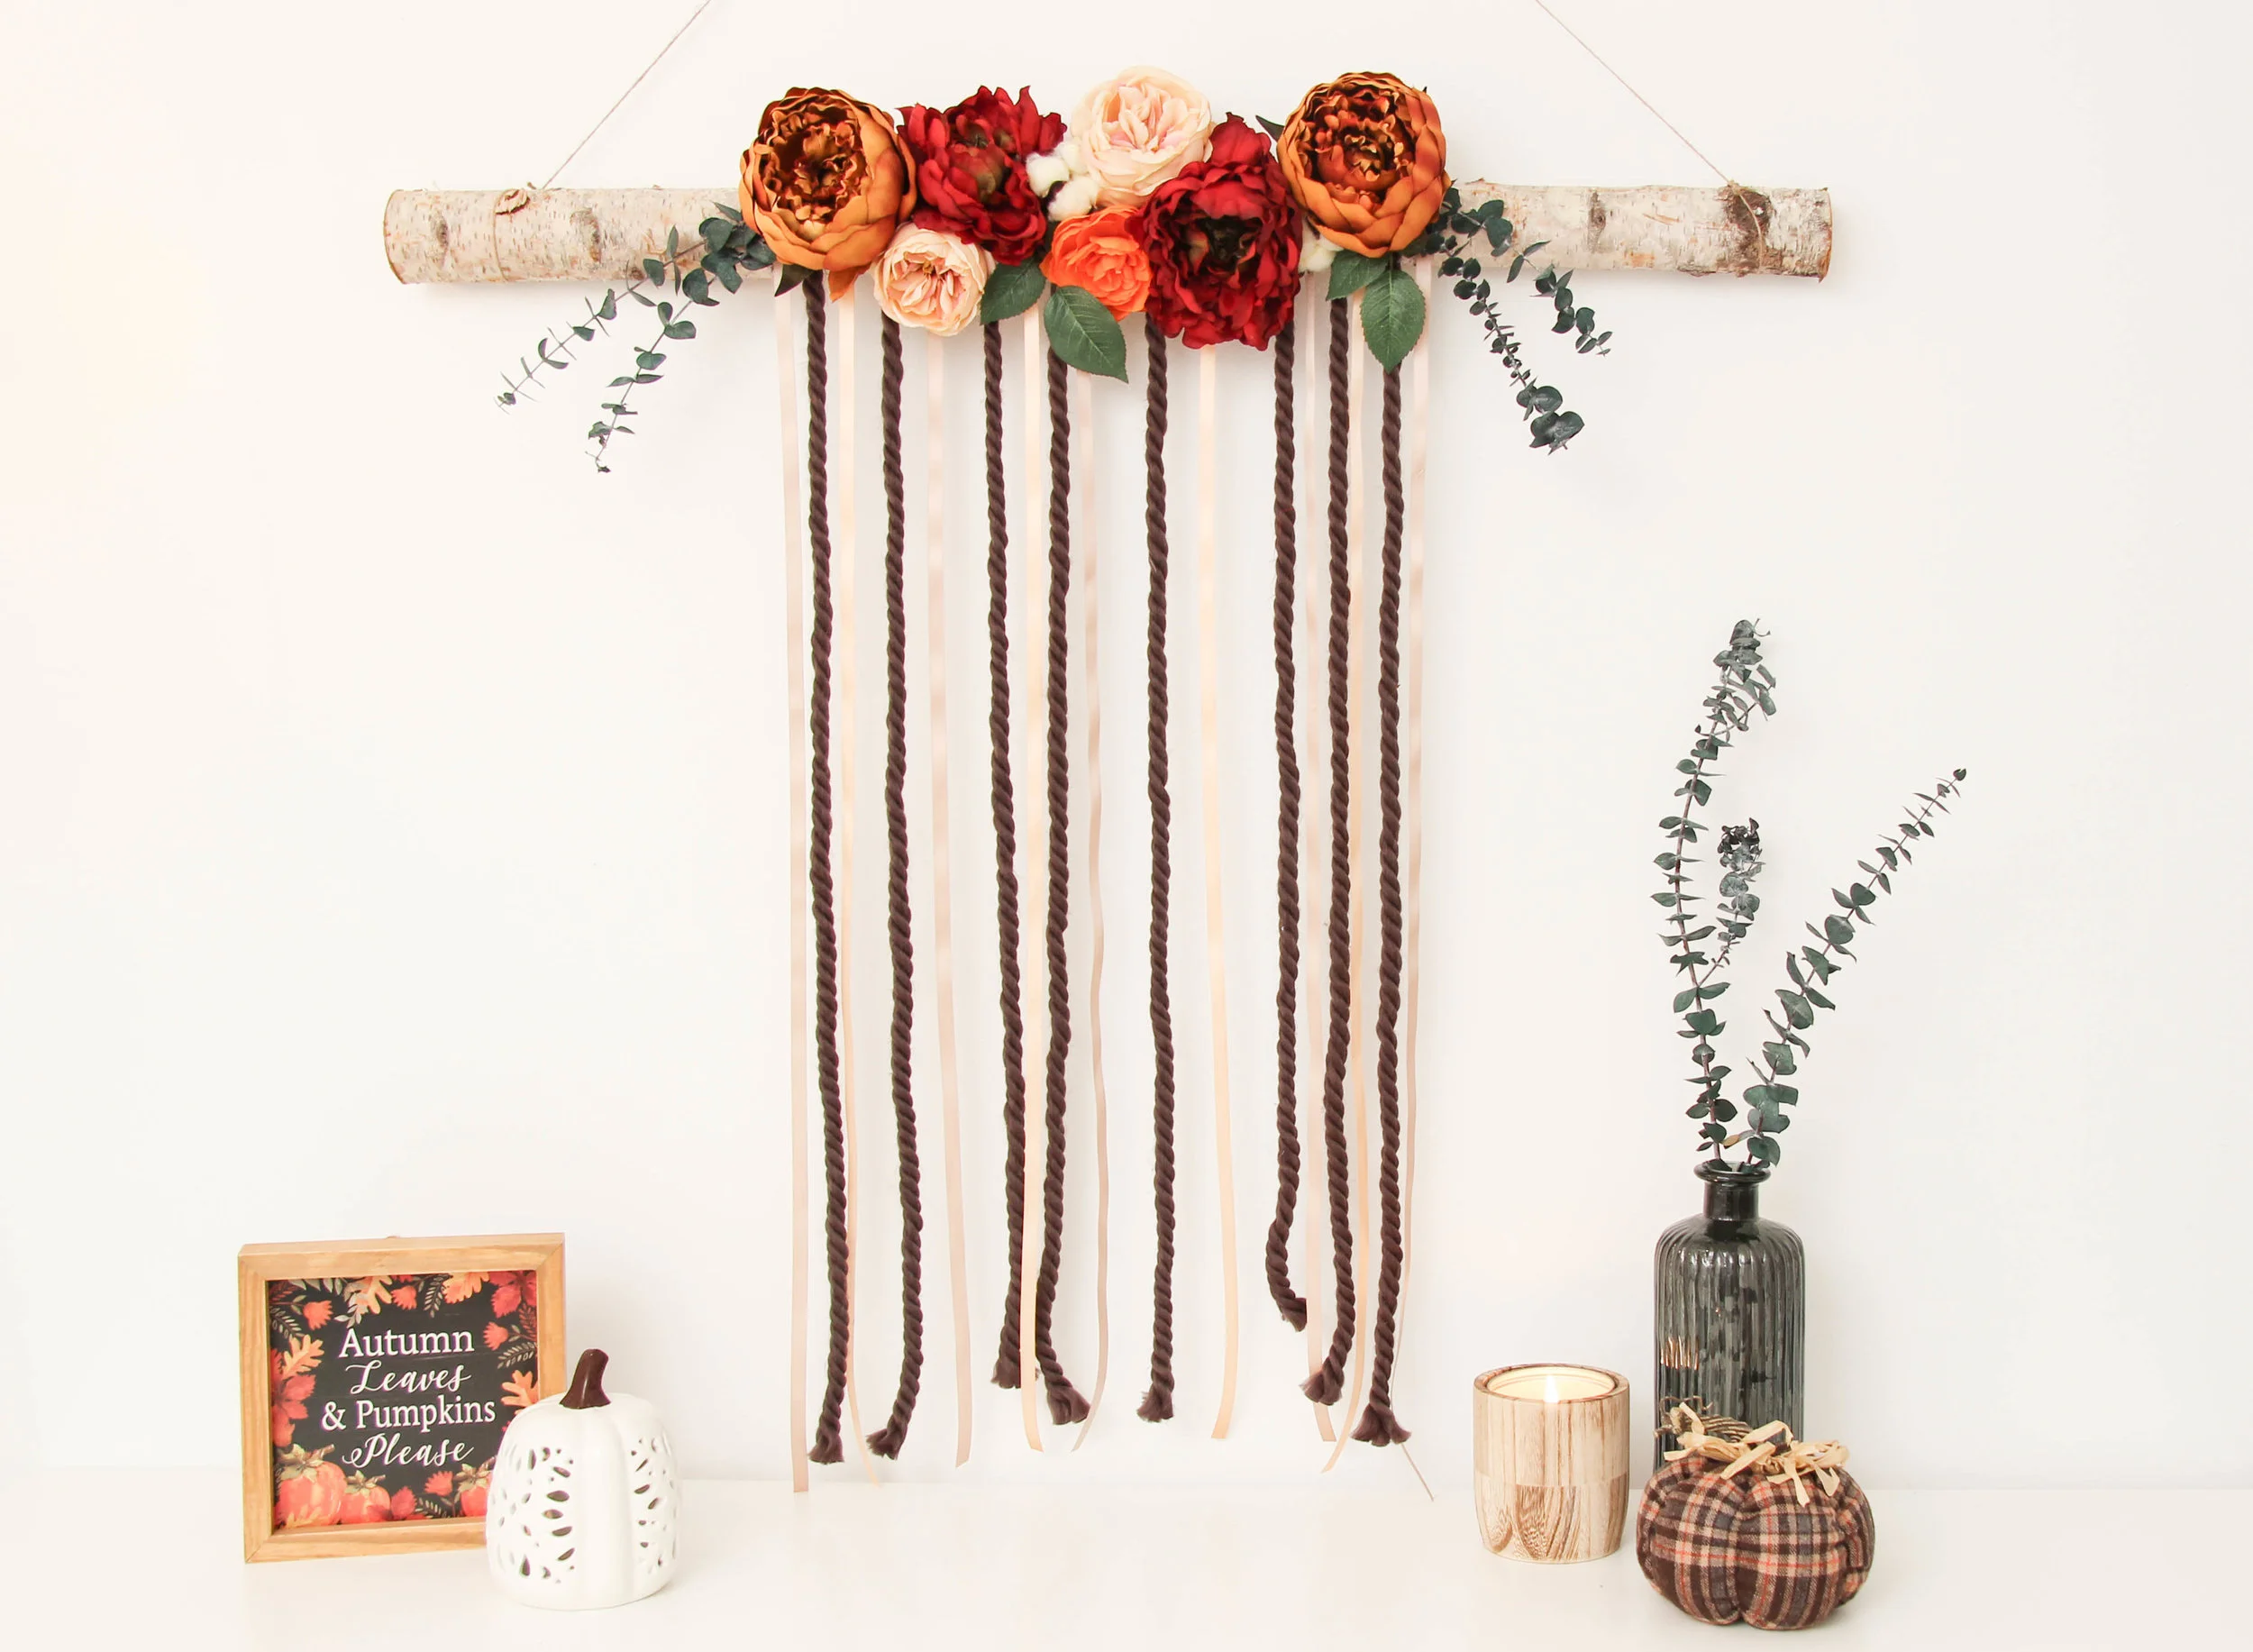
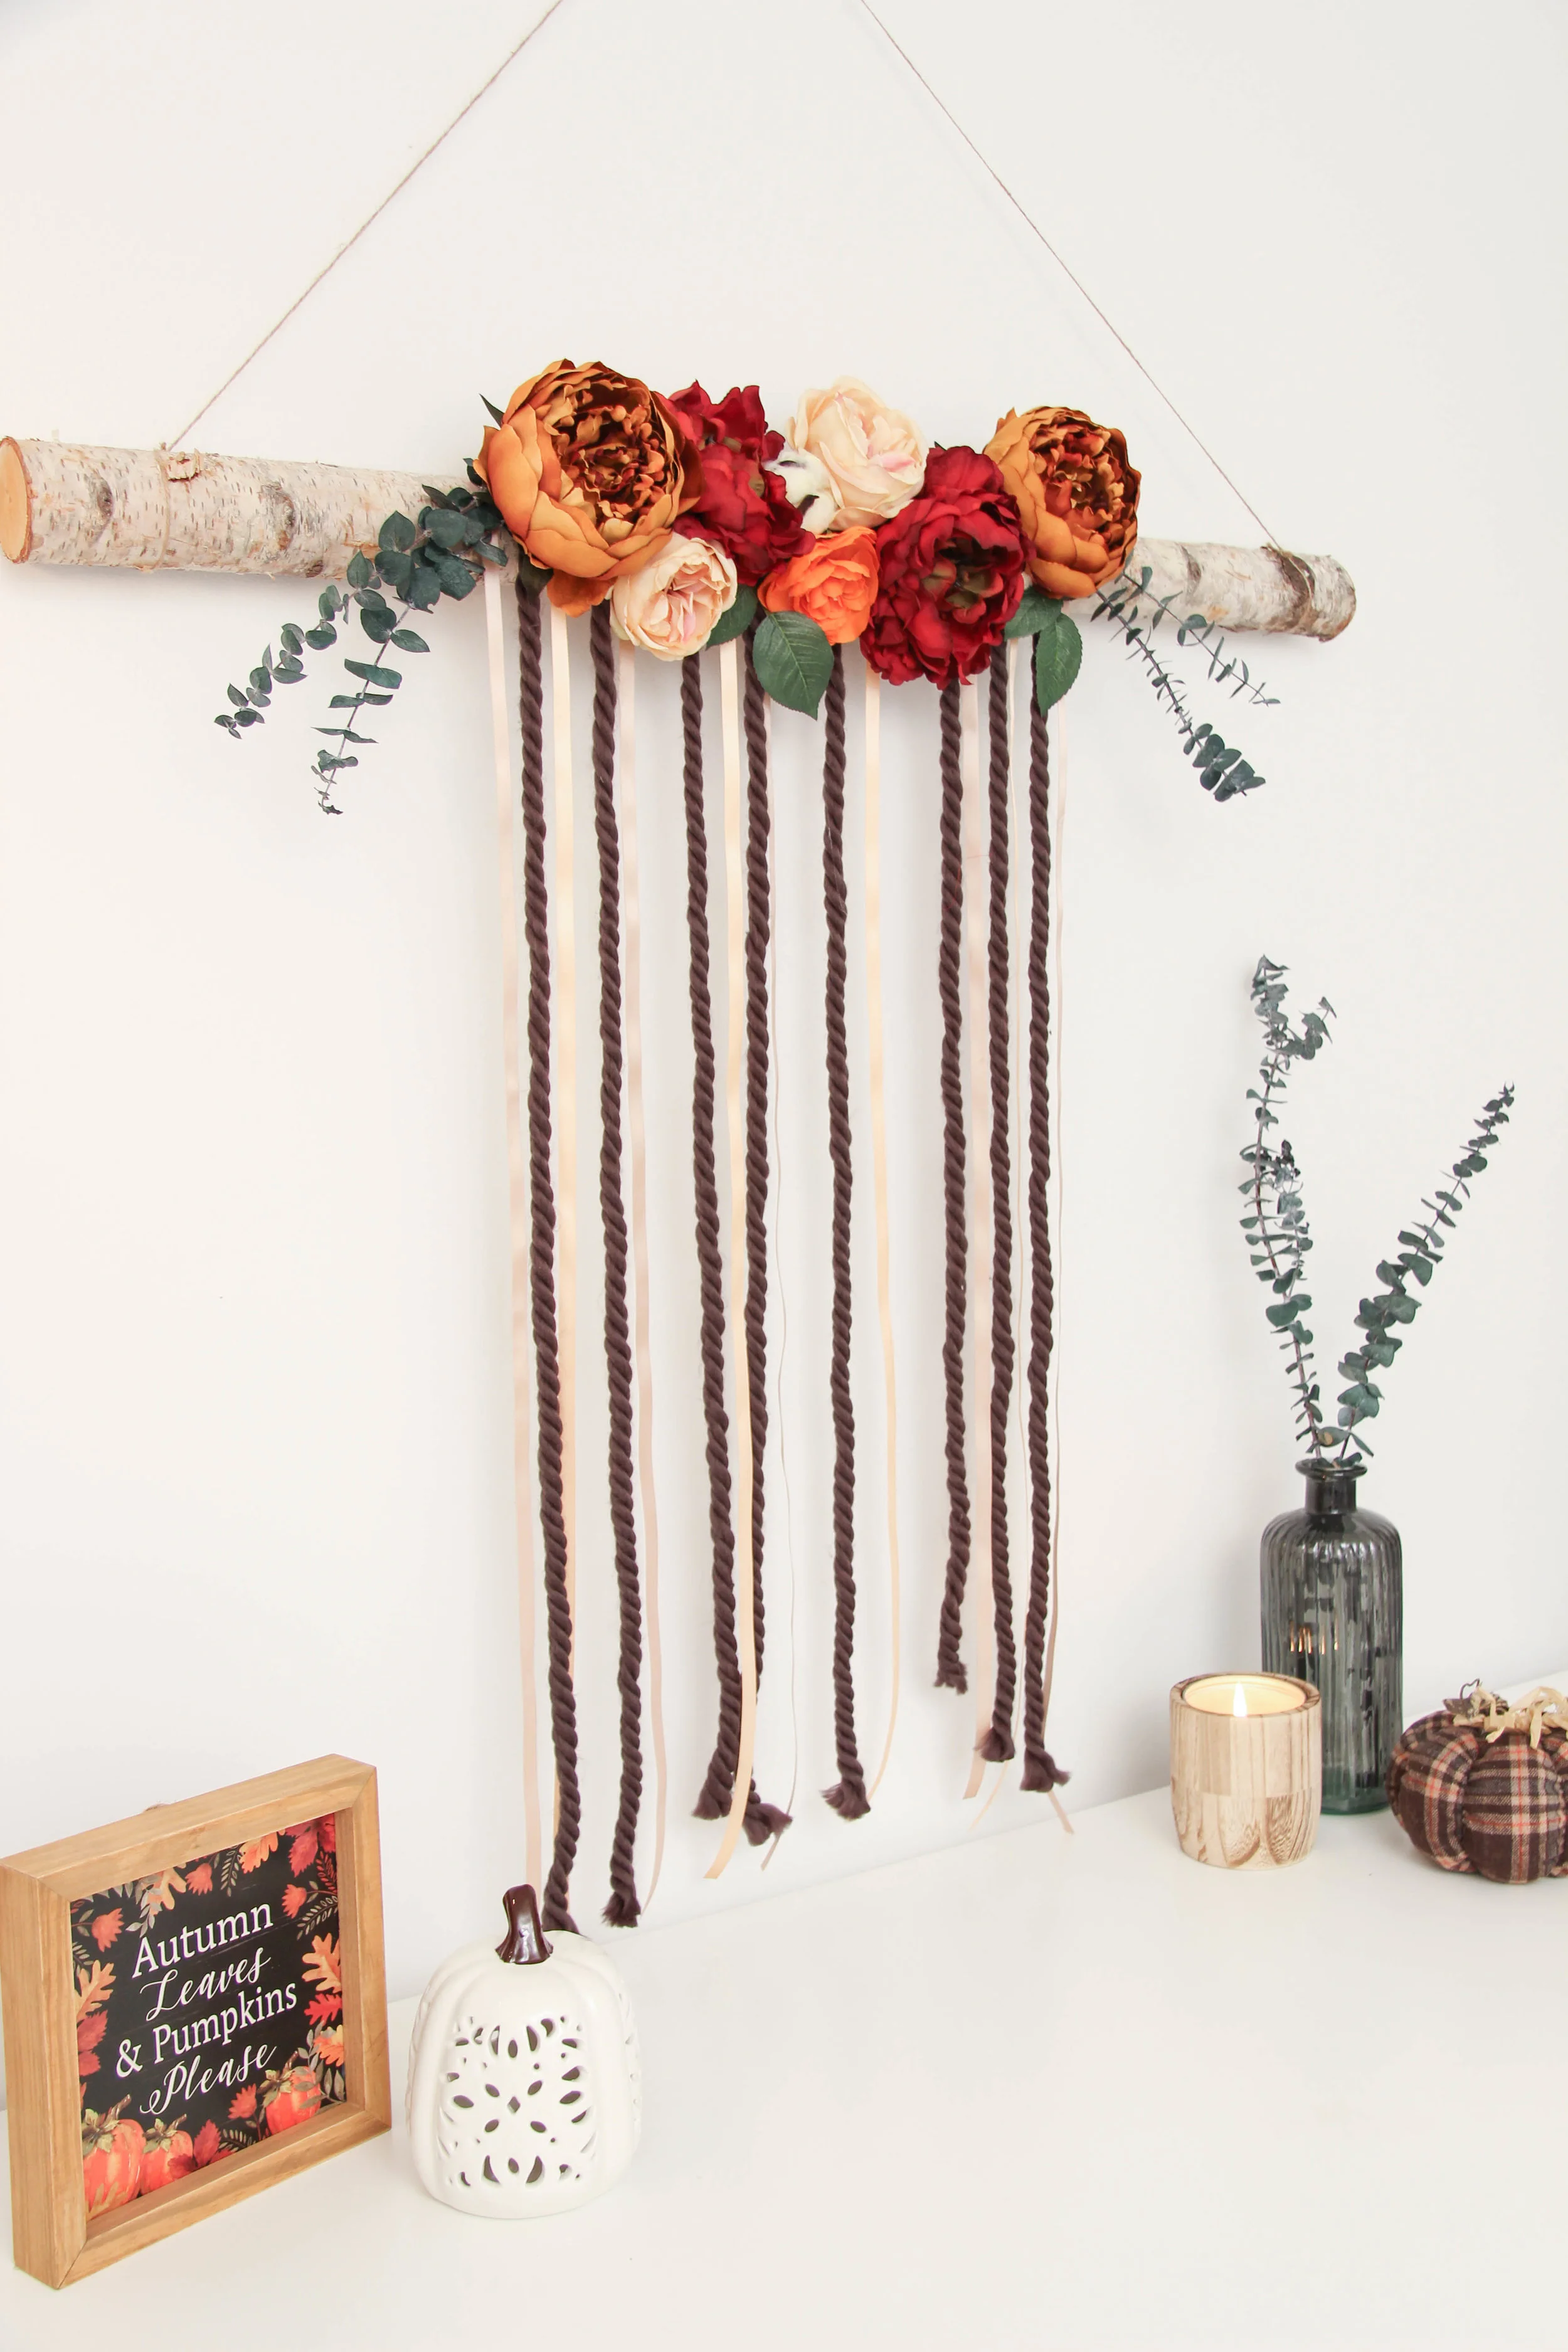
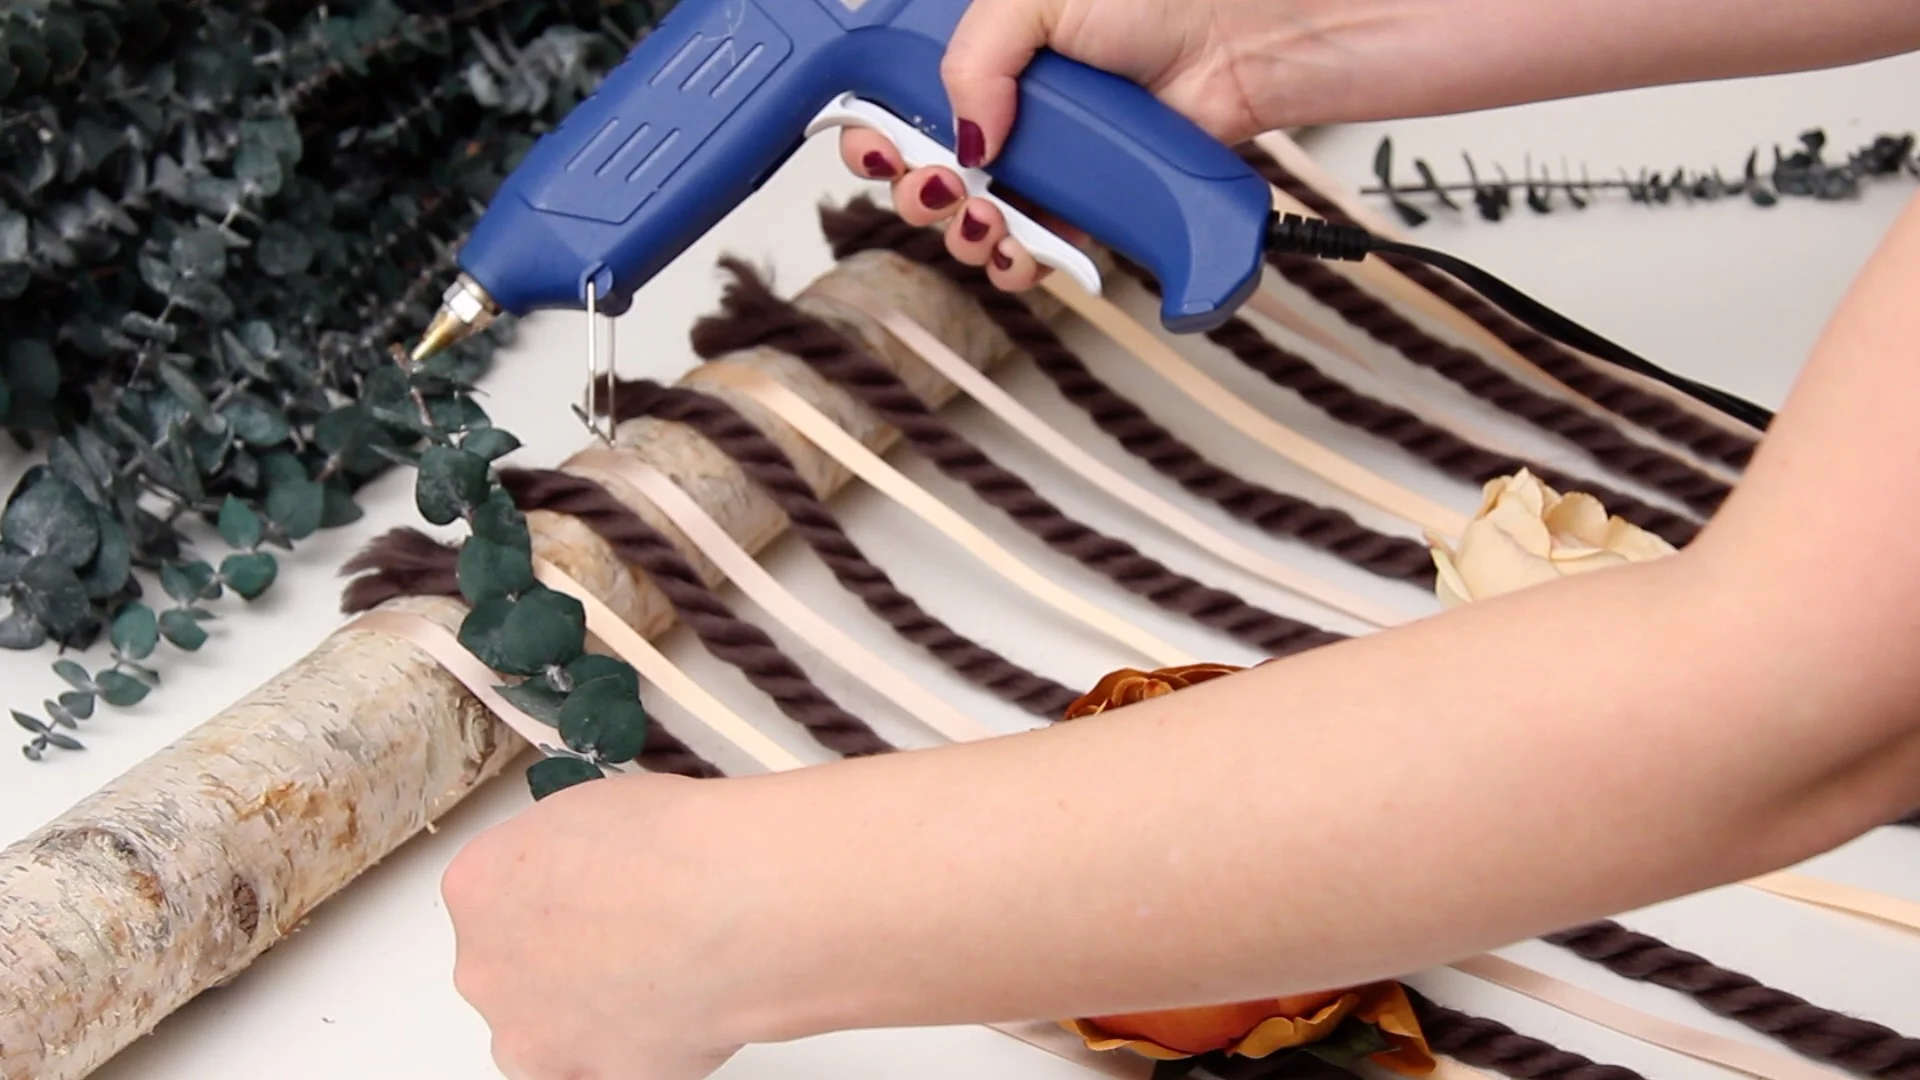
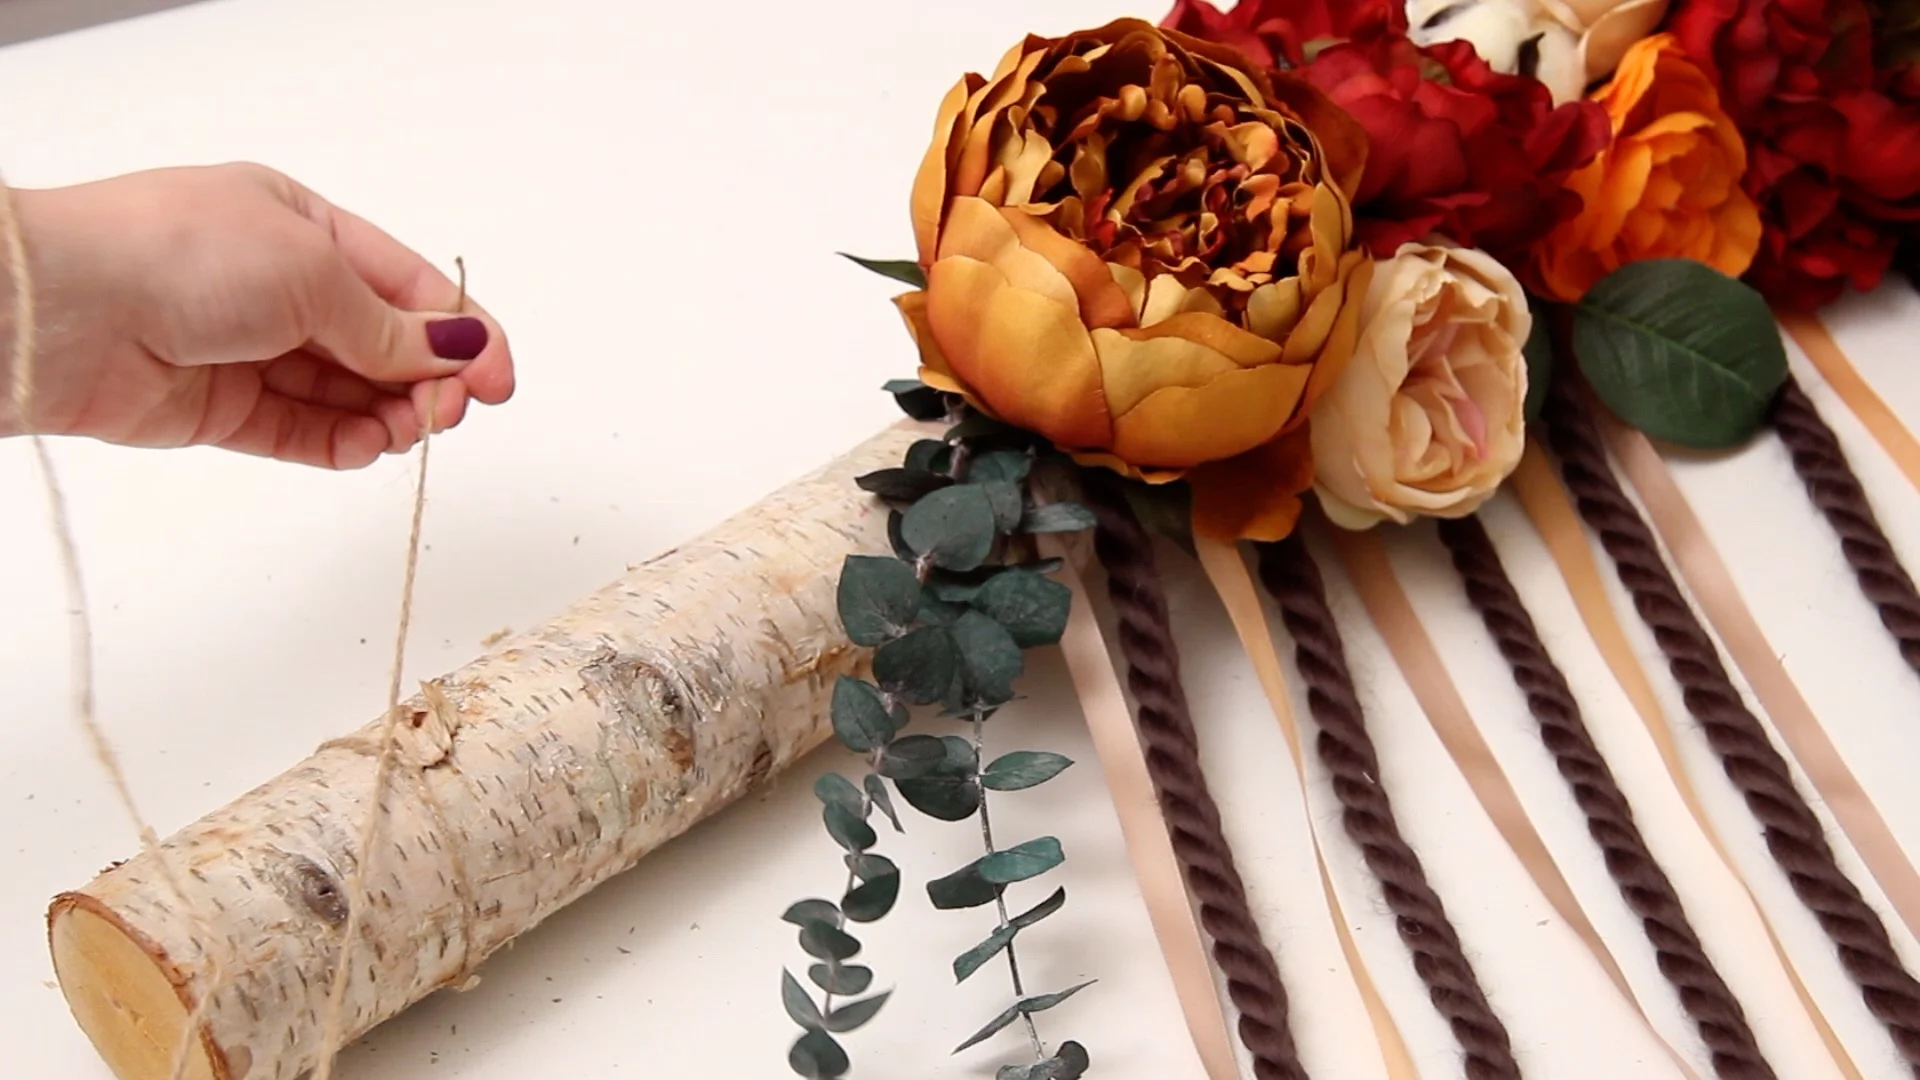
The base of the wall hanging is this stunning birch branch. The natural look of this works really well with the florals.

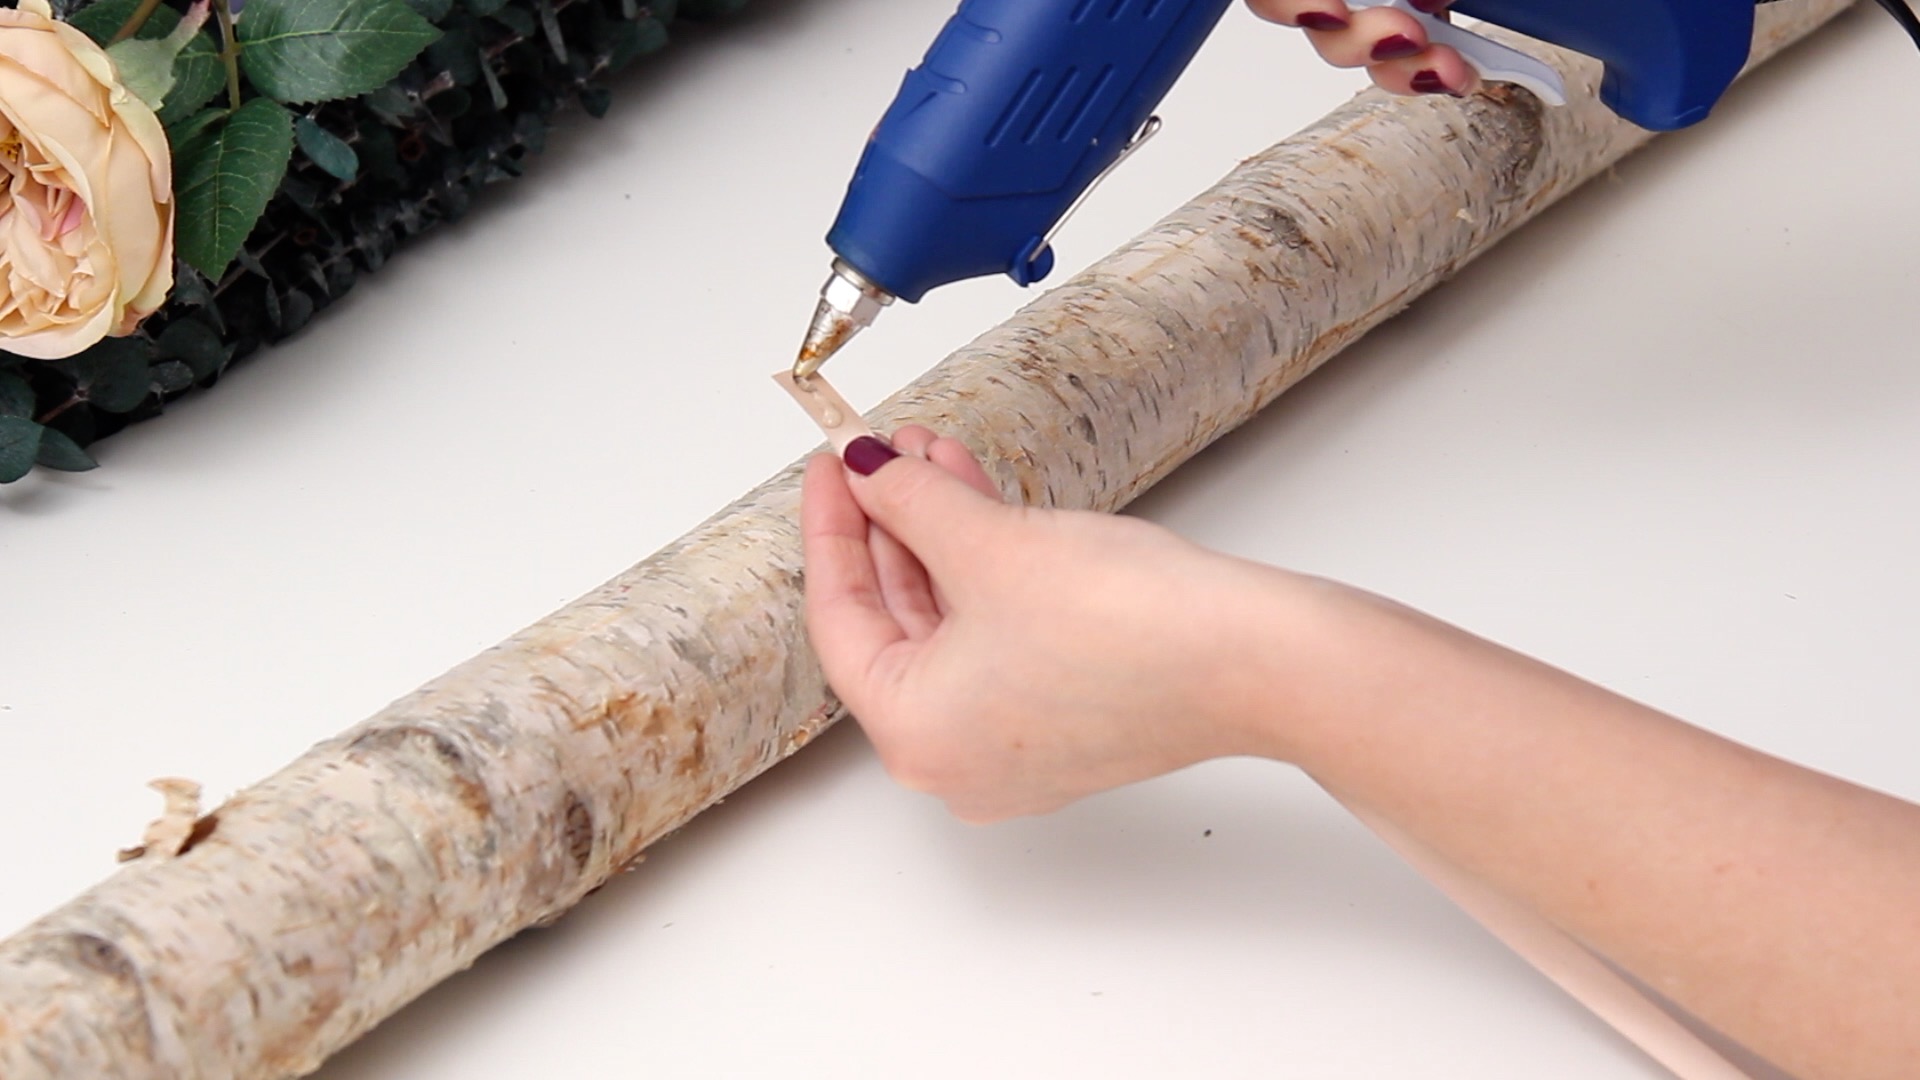
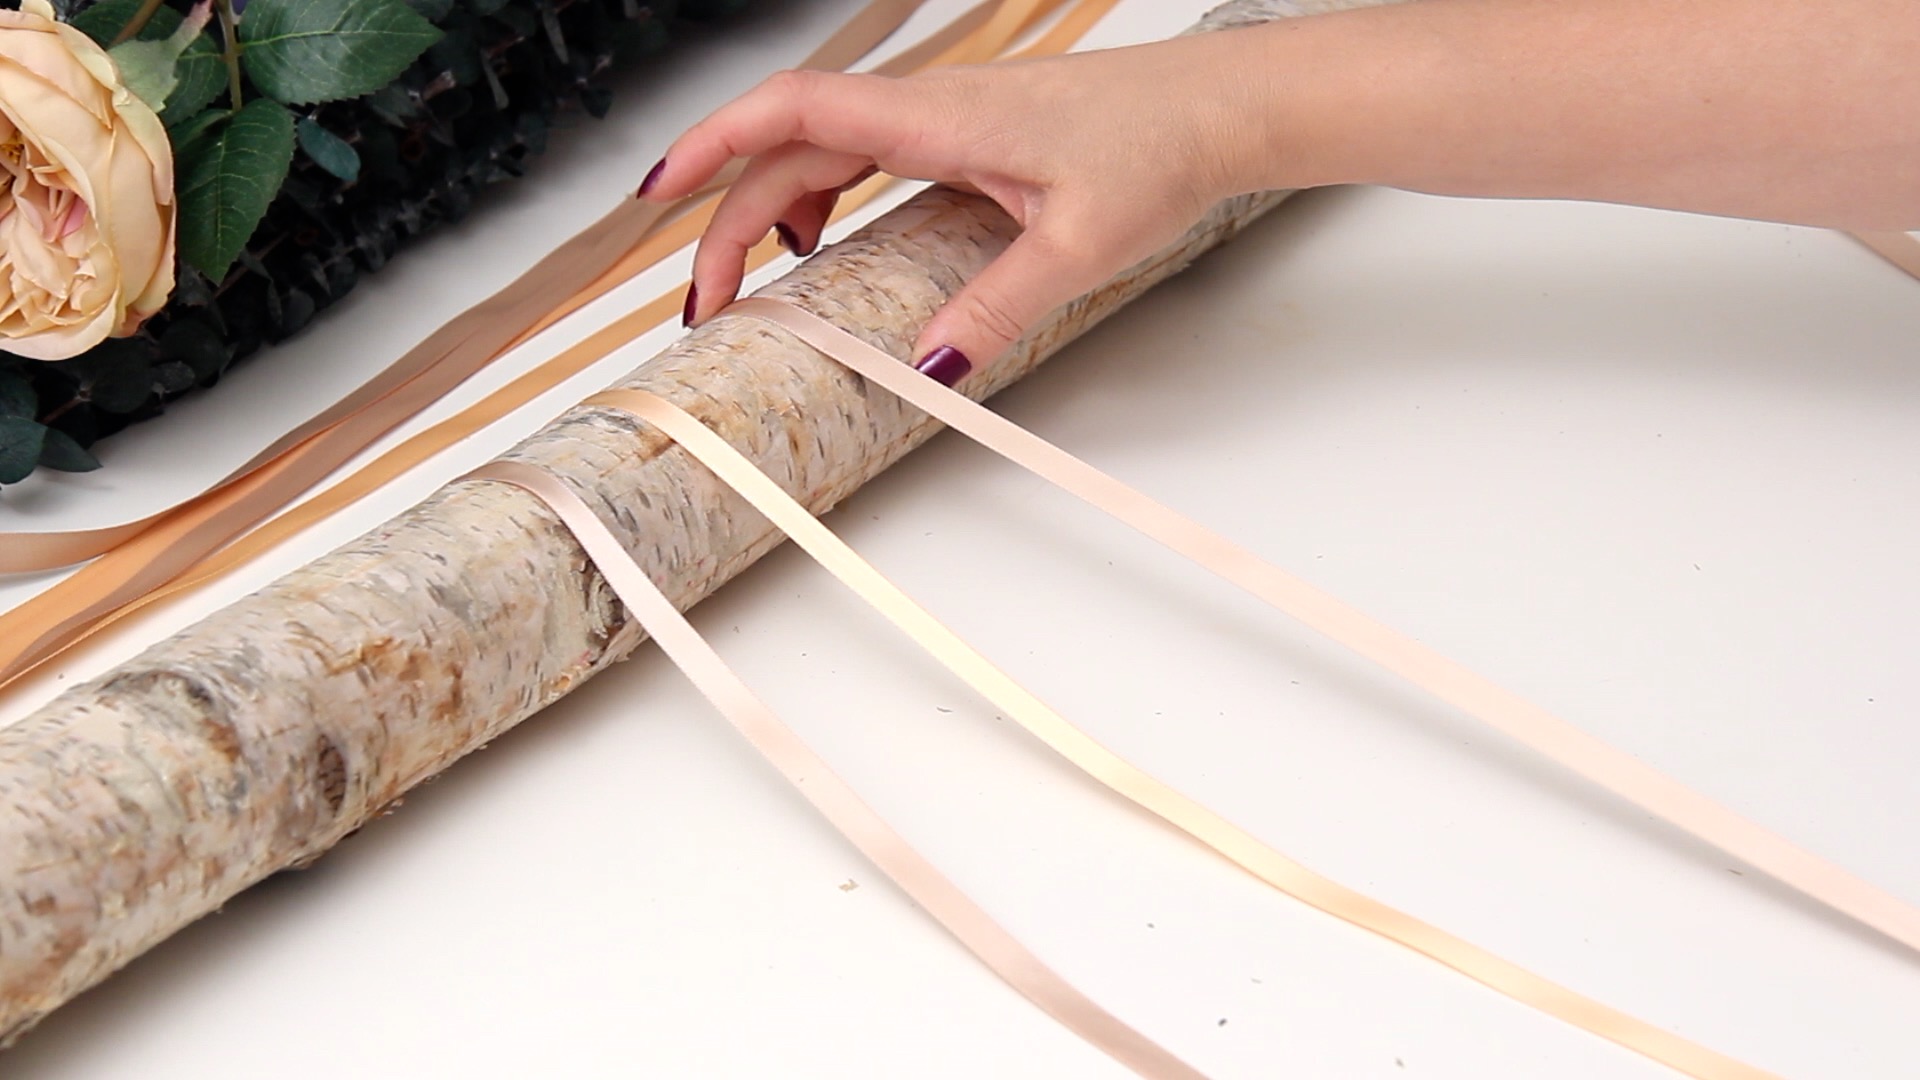
Choose one or two types of ribbon to hang from the branch. Decide how long you want your ribbon to hang (these are 34 inches long) and cut a bunch of pieces of ribbon all to the same length.
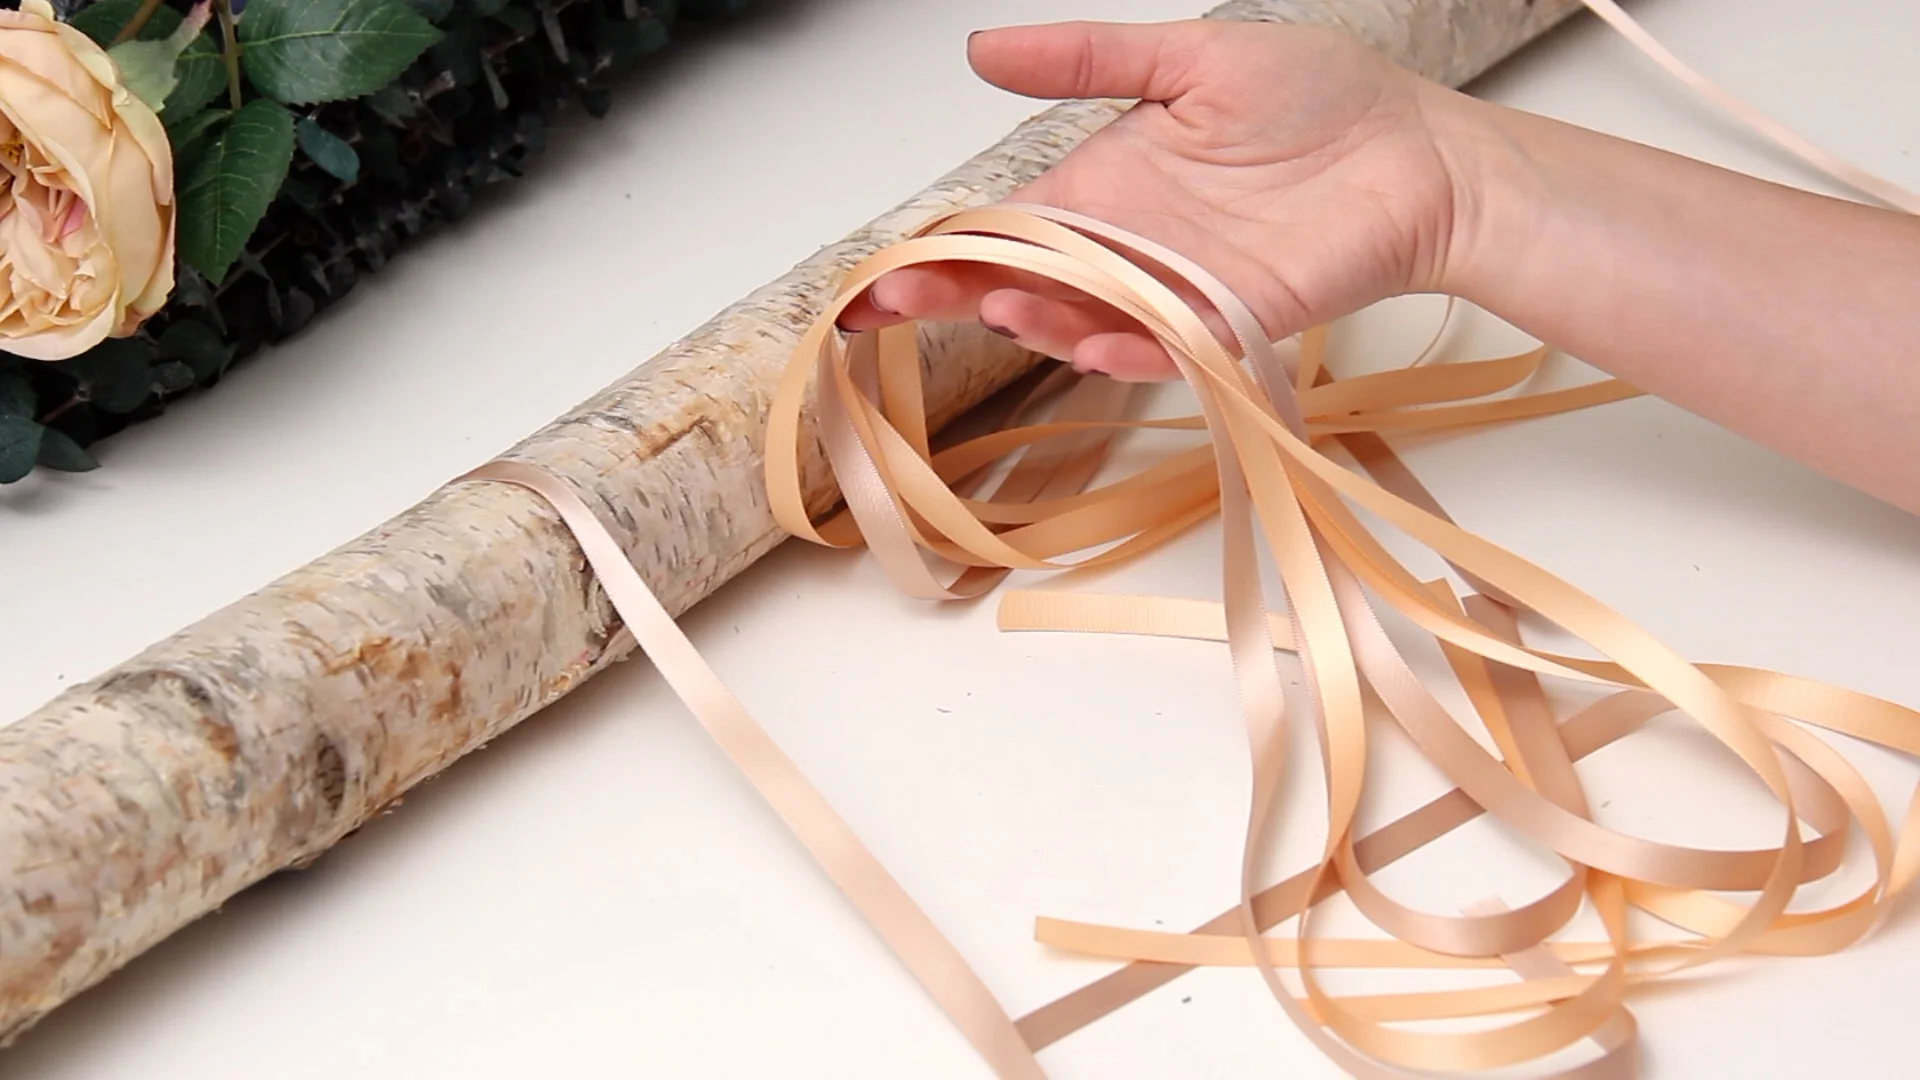
Starting about 10 inches in from the end of the branch, glue each piece of ribbon to the top of the branch, alternating the colors if you’re using more than one. Try to keep them as even as possible, but it doesn’t have to be perfect.

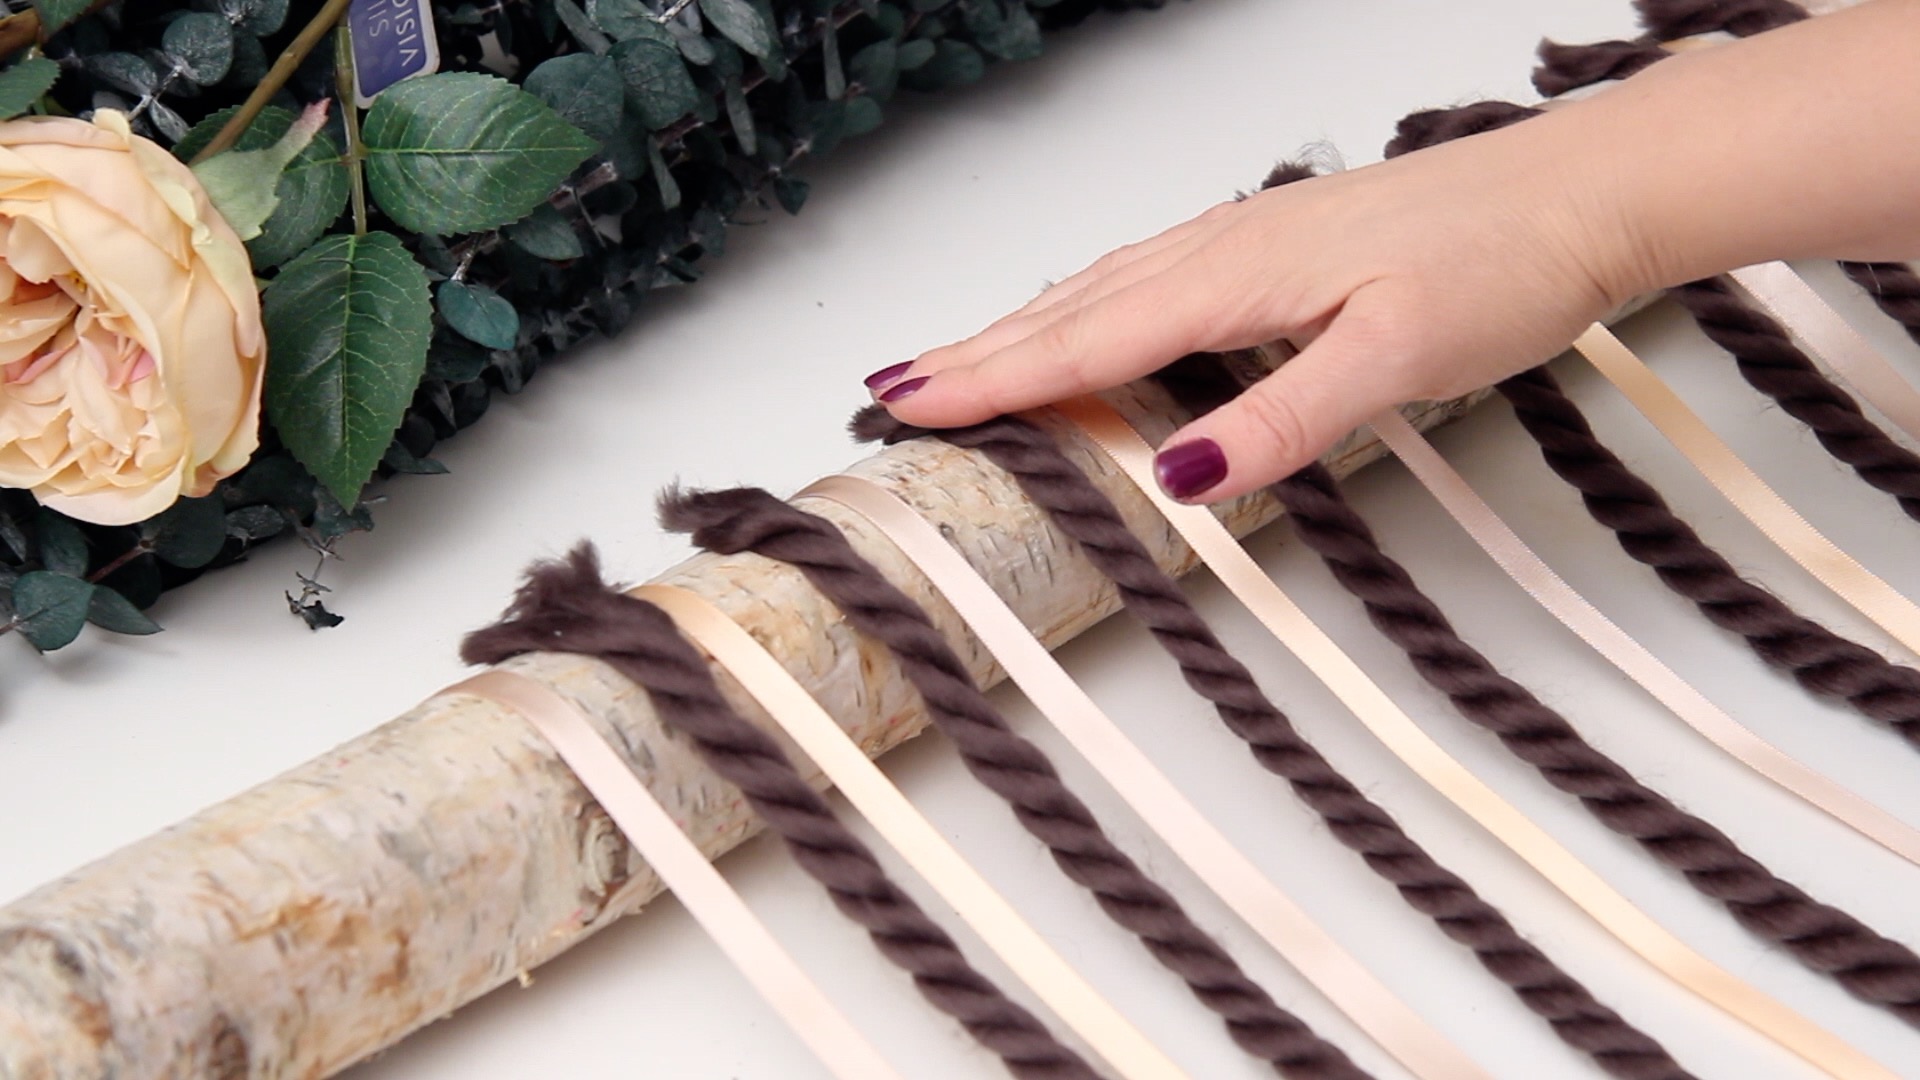
If you want to add a little something extra, cut some yarn to the same length and glue it to the branch in the space between the ribbon.
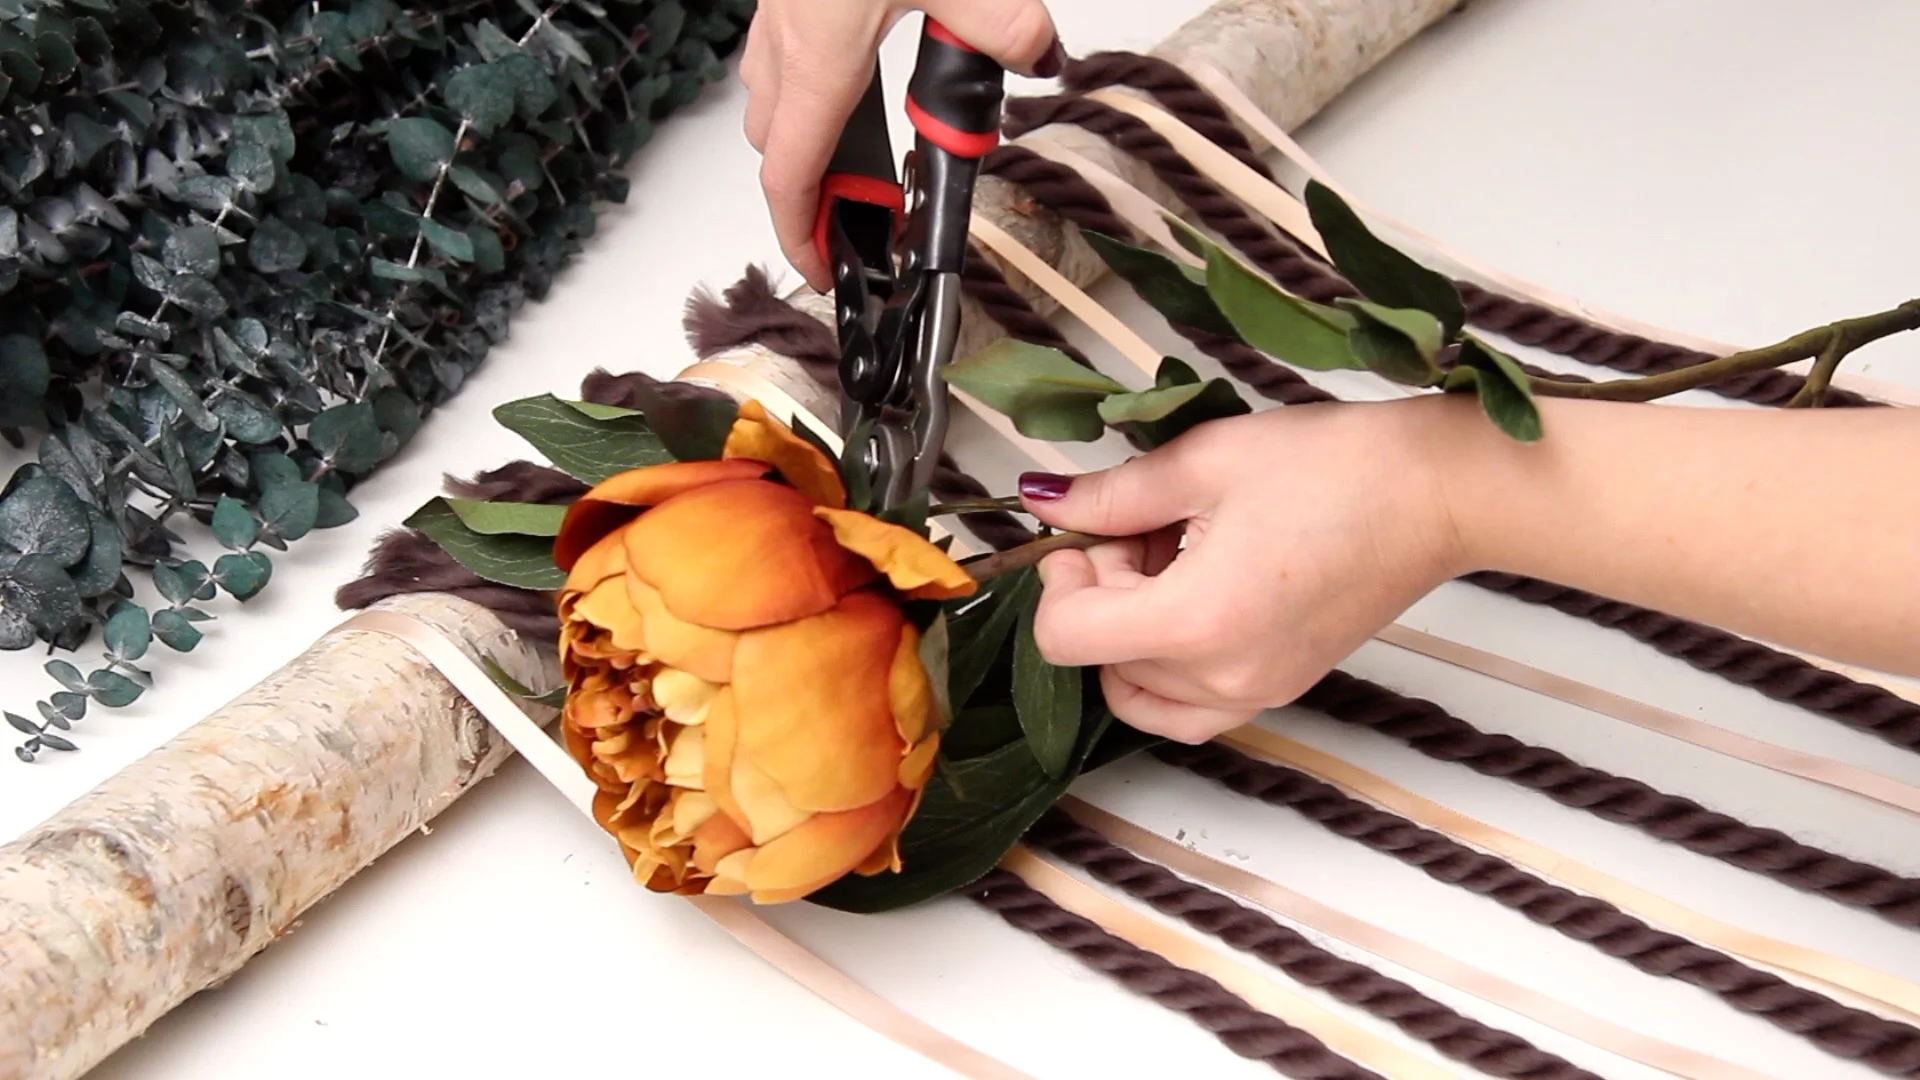
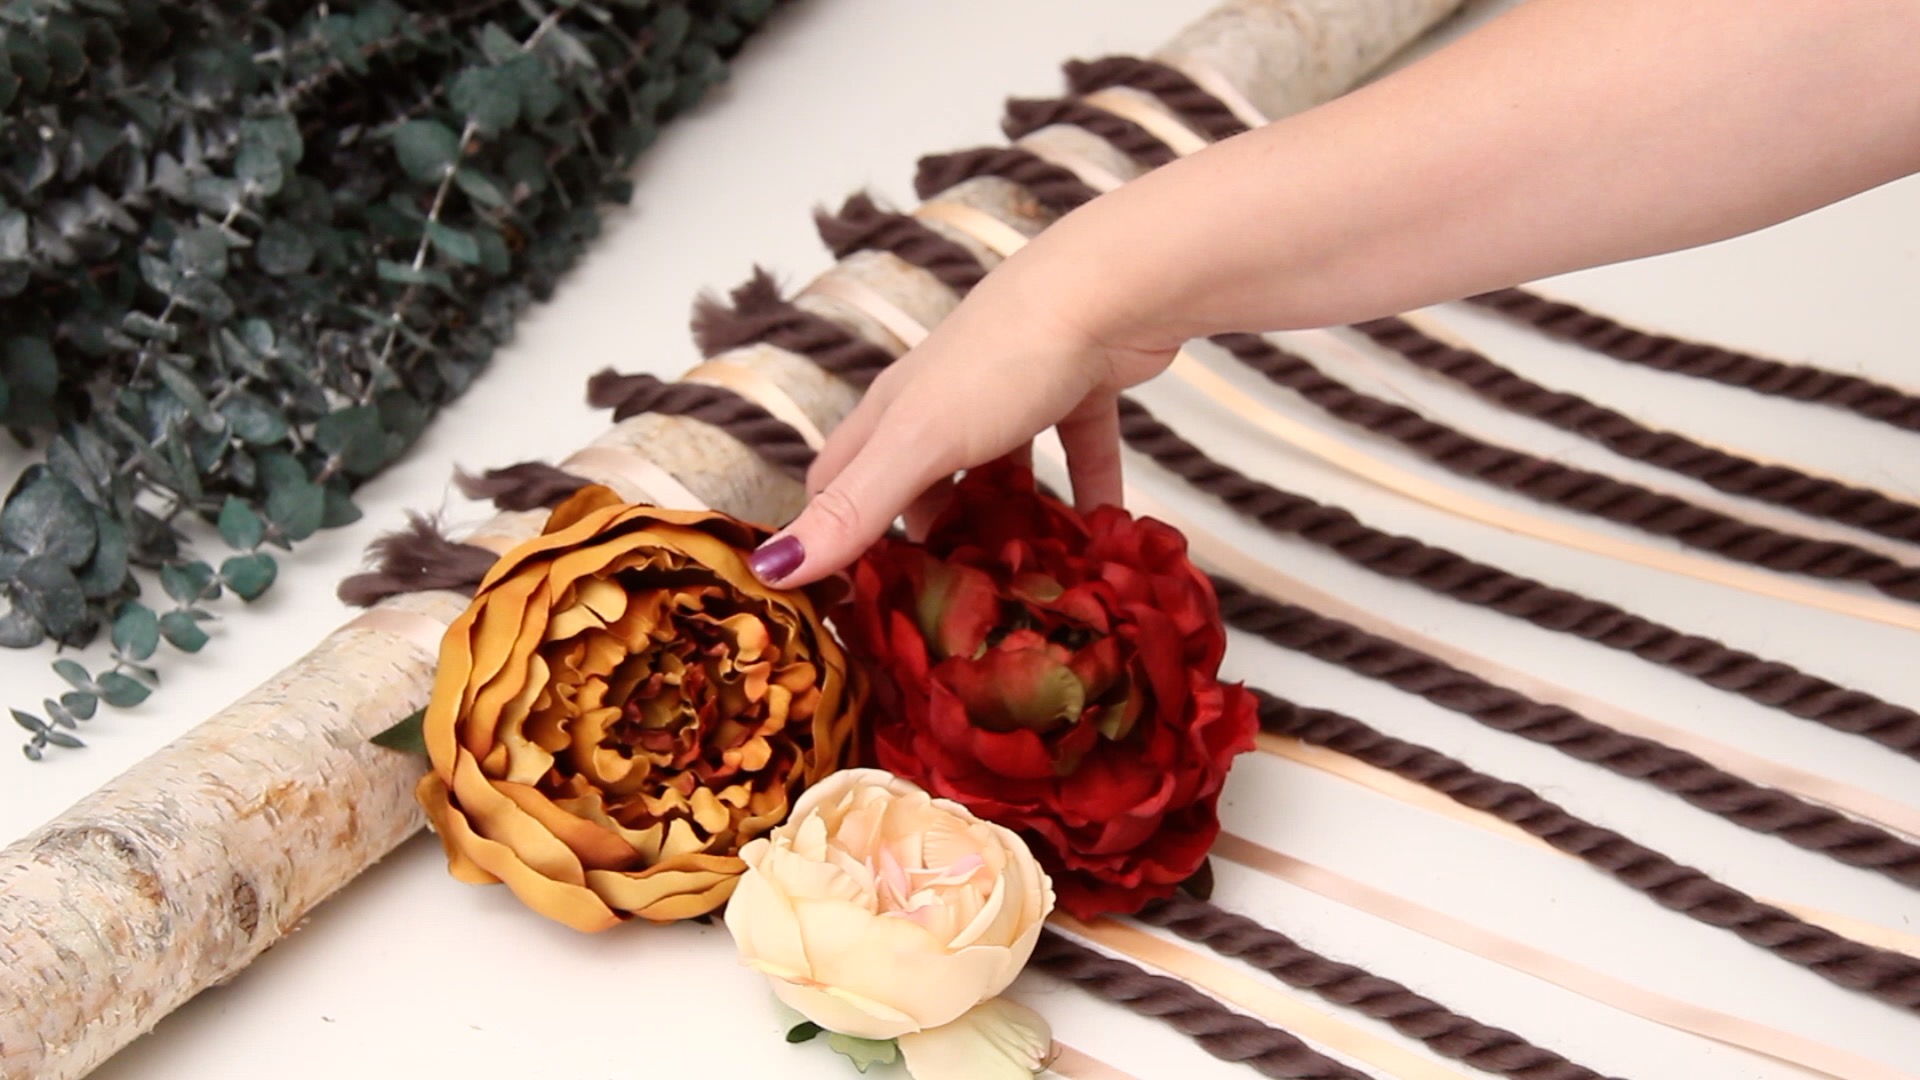
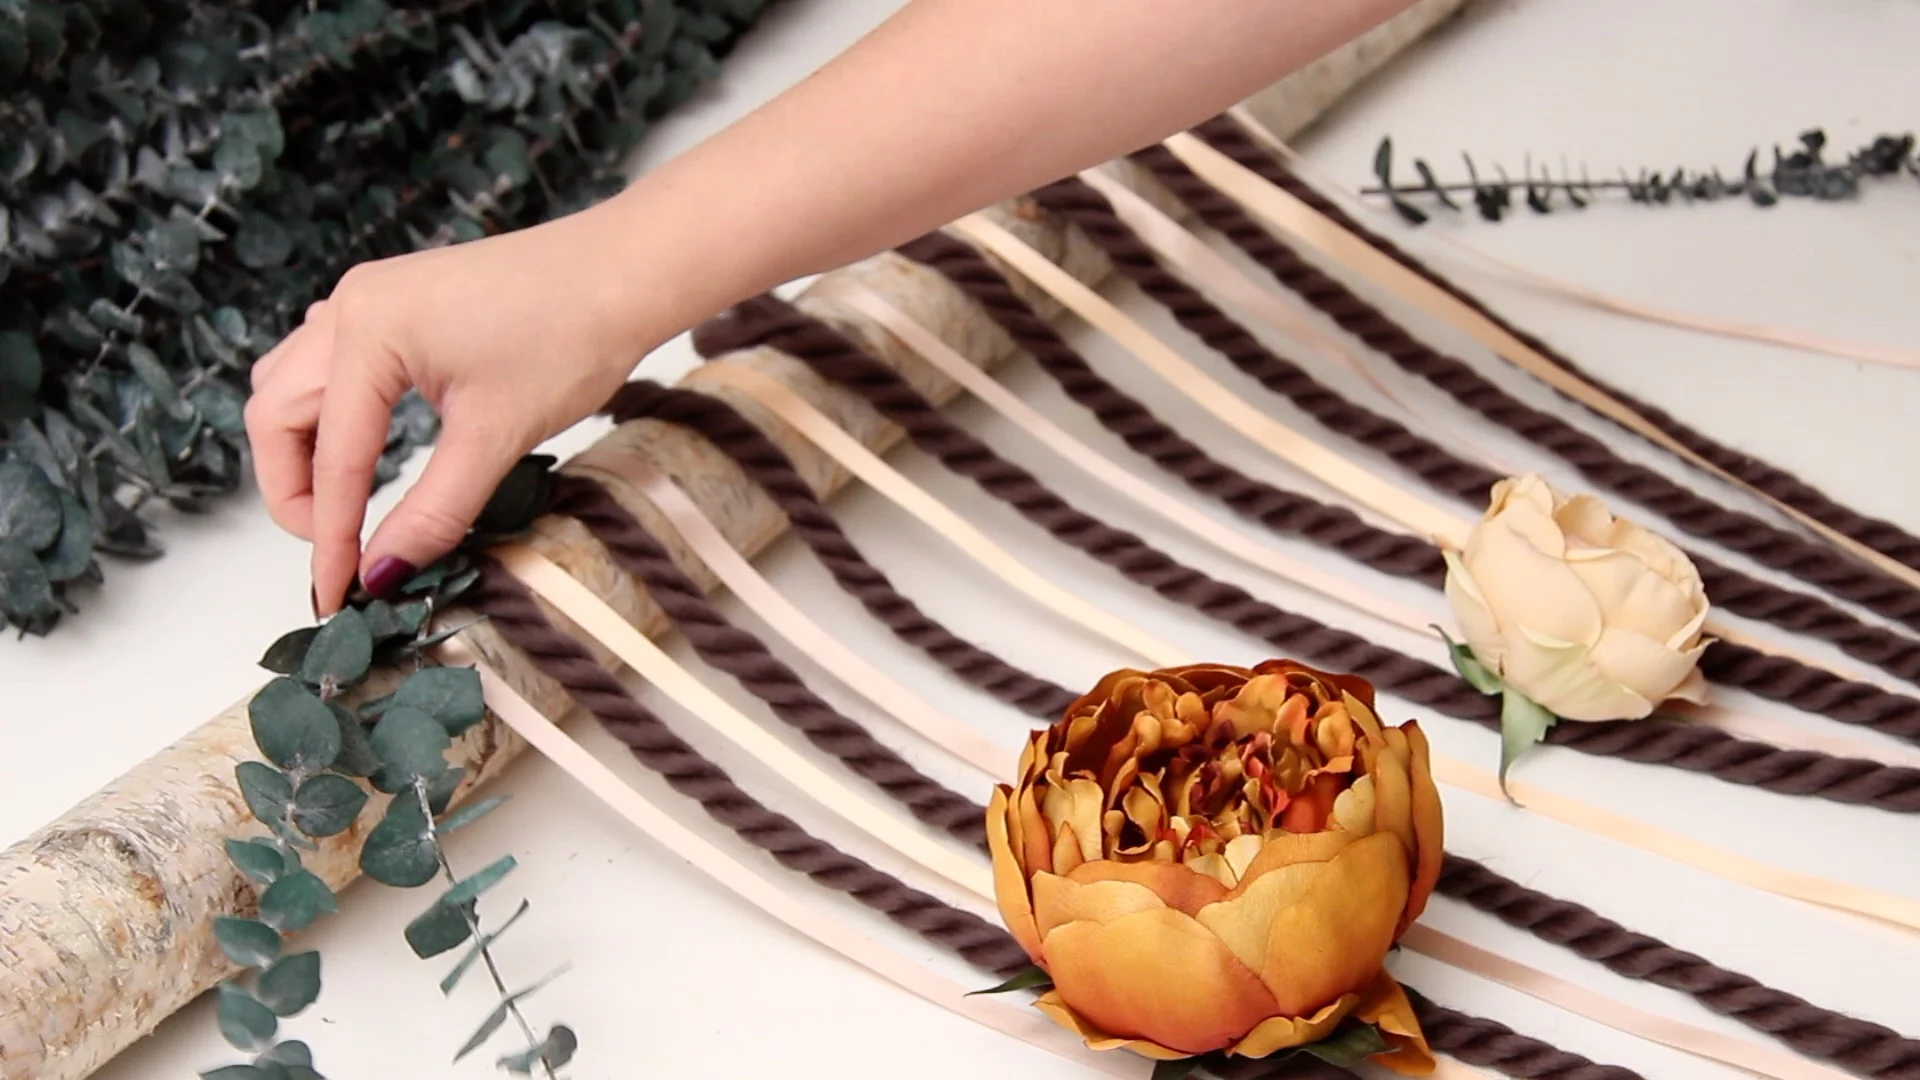
Gather up the flowers that you’ll be using. The great part about this project is that you can customize it for any season or holiday depending on the colors that you choose. Using some wire cutters, cut each flower right at the base, removing it from the stem. It’s helpful to cut all of the flowers first so that you can lay them out before gluing them down.
Before gluing any of the flowers down, add 2 pieces of dried eucalyptus to the branch over your first few pieces of yarn. The contrast of the green against the flowers looks really nice and adds a bit of dimension.
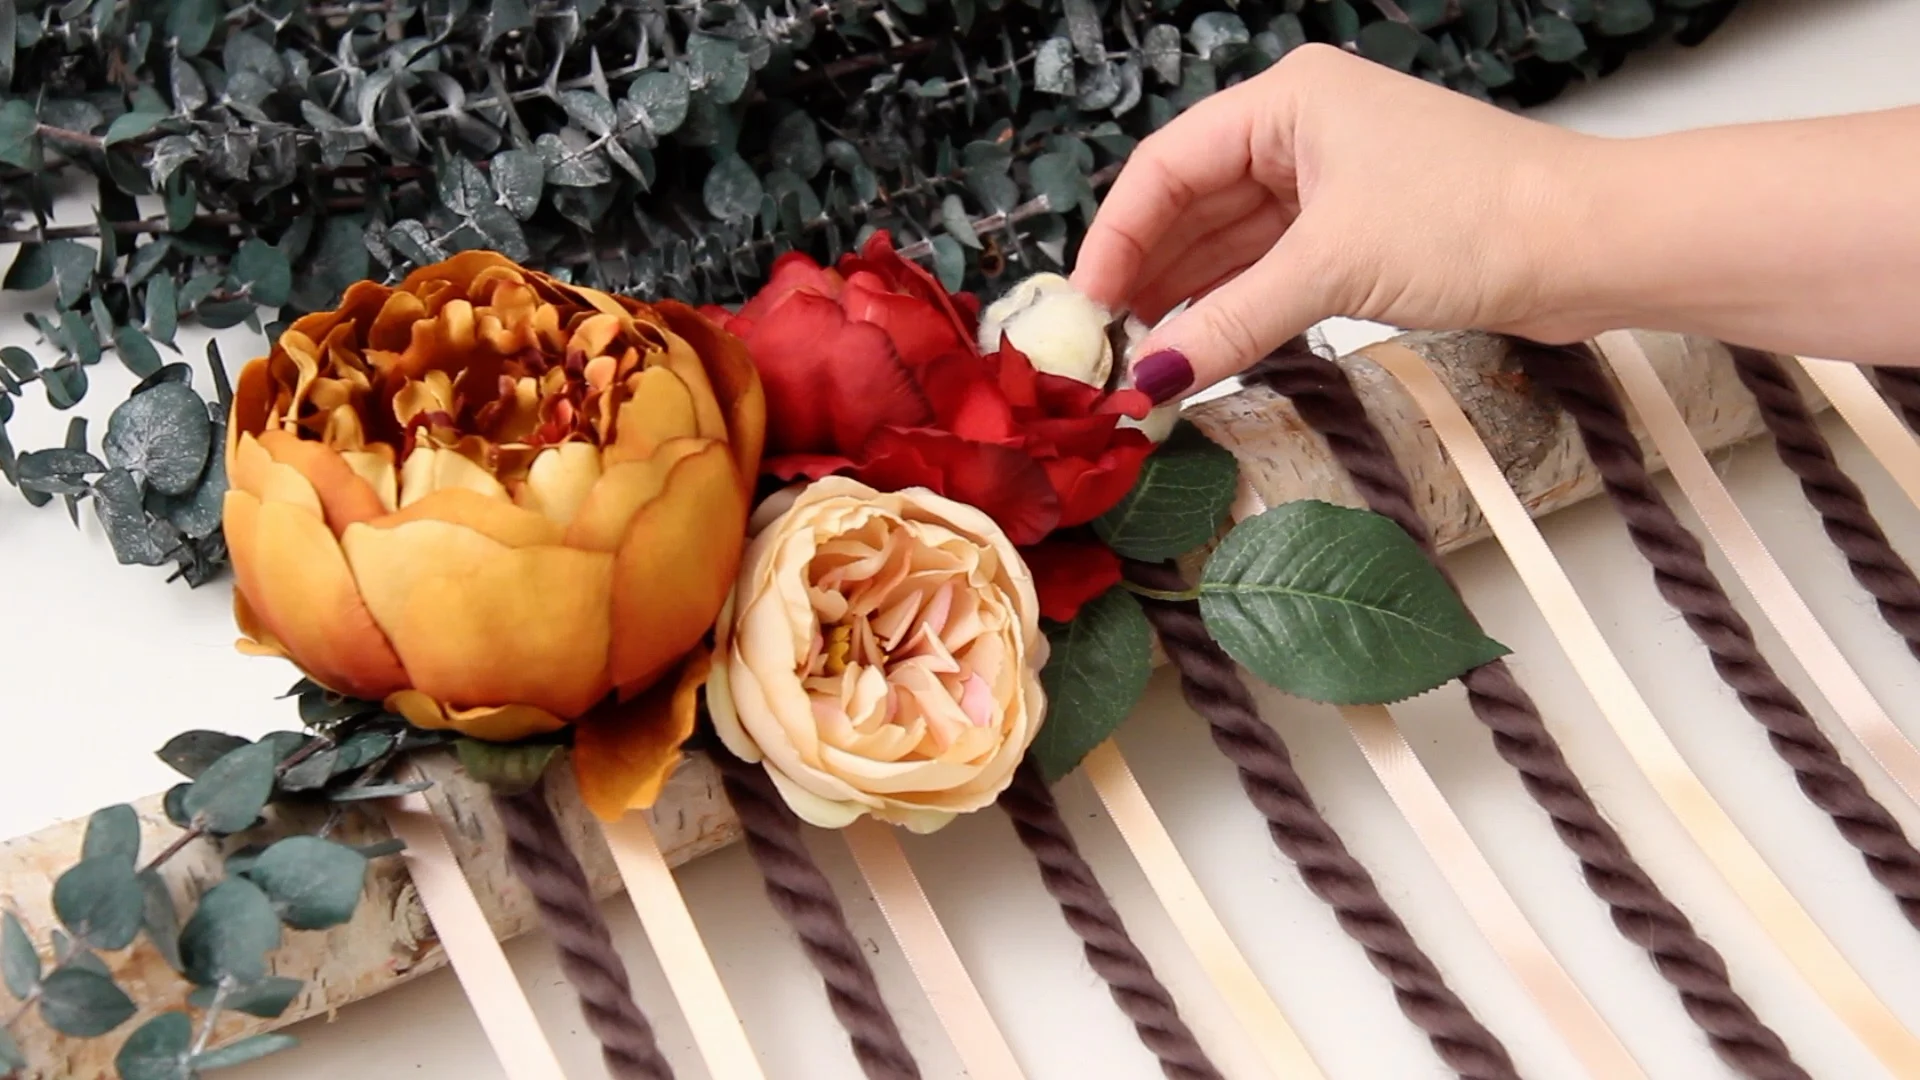
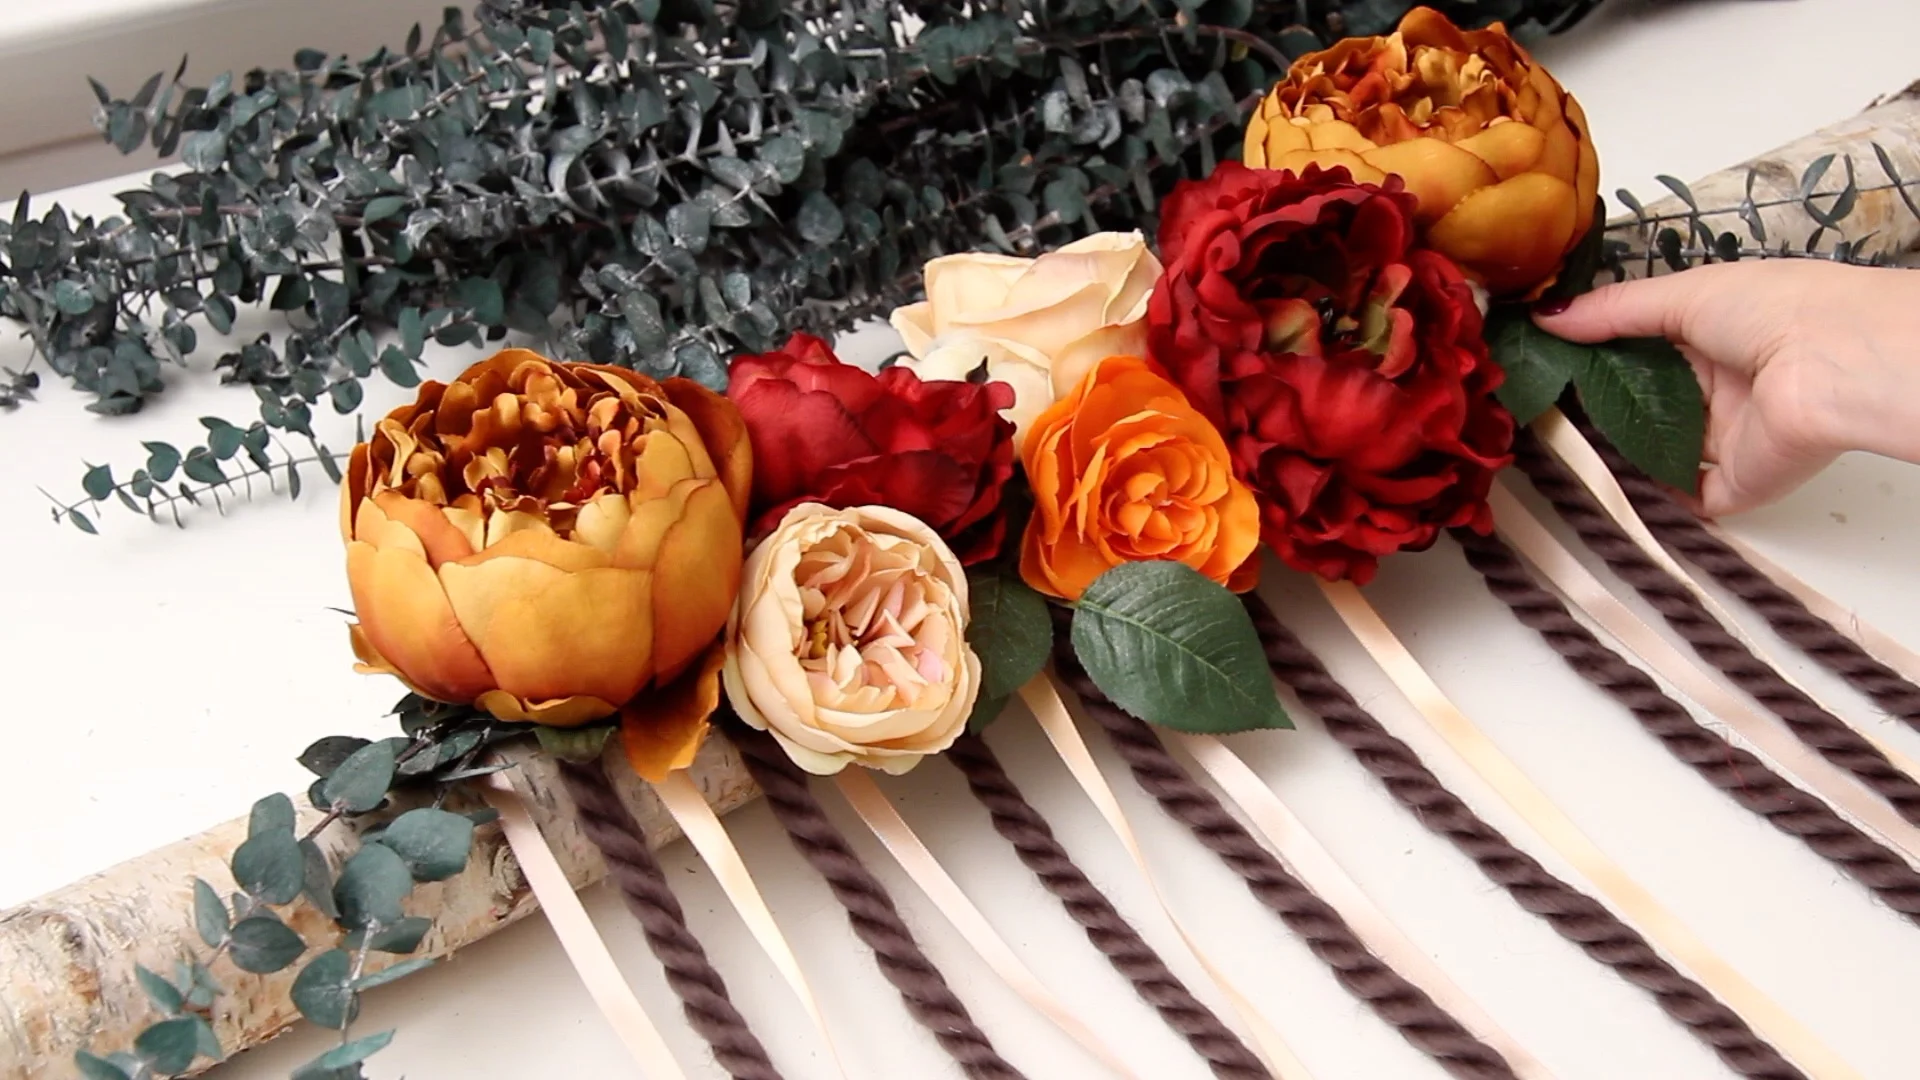
Now for the fun part! Start gluing the flowers to the branch in any pattern that you like. You can keep things symmetrical or go for more of a random, wildflower look. Add in things like leaves from the stems and cotton as extra filler.


To hang, slide a piece of twine under the end of the branch and tie a double knot. Repeat on the other side. Snip the excess twine and it’s ready to hang!
This would be beautiful as a home decor piece but would also be perfect as wedding or nursery decor. The possibilities are endless!